Perfect Ramen Eggs Ajitama – Easy Marinated Soft Boiled
Ramen eggs, or ajitama as they are known in Japan, are the unsung heroes of any great ramen bowl. You know, those perfectly jammy, impossibly flavorful marinated soft-boiled eggs that just elevate everything they touch? That glorious golden yolk, subtly sweet and savory, cradled in a tender, marinated white – it’s pure culinary magic. I’ve spent countless hours perfecting my own ramen egg recipe, and I’m so excited to share it with you. What makes these so addictive? It’s the incredible depth of flavor achieved through a simple yet potent marinade, transforming an ordinary egg into an extraordinary experience. They’re more than just an egg; they’re a commitment to deliciousness, a burst of umami that makes every slurp of ramen a truly satisfying adventure.
Ramen Eggs (Ajitama)
There’s nothing quite like a perfectly cooked ramen egg, or ajitama, to elevate your bowl of noodles from good to absolutely divine. Those tender whites, kissed with savory soy sauce, and a rich, custardy yolk that melts into the broth – it’s pure magic. While they might seem like a restaurant-only luxury, making your own ajitama at home is surprisingly simple and incredibly rewarding. Forget the disappointment of overcooked or bland eggs; with this recipe, you’ll achieve ramen egg perfection every single time. This recipe focuses on achieving that ideal jammy yolk, a signature of a truly exceptional ajitama.
Ingredients:
The Marinade: A Symphony of Flavors
The magic of ajitama lies not just in the perfectly cooked egg, but also in the flavorful marinade that it soaks in. This simple mixture of soy sauce, water, non-alcoholic mirin, and sugar is designed to impart a deep umami flavor and a subtle sweetness to the eggs, while the non-alcoholic alternative in the non-alcoholic mirin (in this non-non-non-alcoholic alternativeic version, the sugars still contribute to the flavor profile) helps tenderize the whites. It’s a balance that is crucial for that signature ramen egg taste.
Crafting the Perfect Ramen Eggs: Step-by-Step
Achieving that coveted jammy yolk requires a precise boiling time and a careful cooling process. Don’t be intimidated; I’ll walk you through each step to ensure success.
Step 1: Boiling the Eggs to Perfection
This is arguably the most critical step. We want to achieve a yolk that is cooked through but still gloriously jammy and soft. To start, bring a medium saucepan of water to a rolling boil. If you’re using vinegar (and I recommend it, as it helps prevent the whites from spreading too much if an egg cracks), add about a tablespoon of vinegar to the boiling water. Gently lower your eggs into the boiling water using a slotted spoon. Be careful not to drop them, as this can cause them to crack.
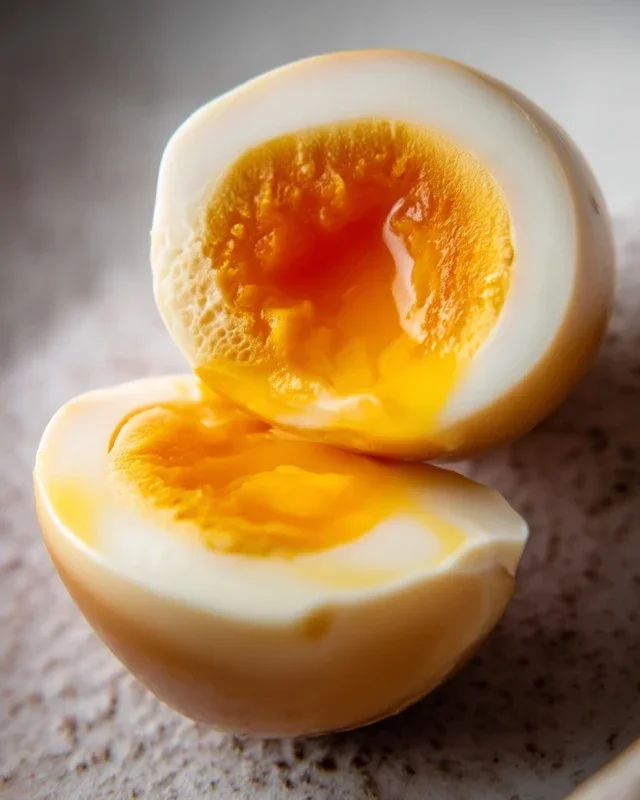
Once the eggs are in, start your timer immediately. For large eggs, aim for exactly 6 minutes and 30 seconds for a perfectly jammy yolk. Some recipes might call for 7 minutes, but I find this can sometimes push it towards a fully hard-boiled yolk. It’s better to err slightly on the side of undercooked at this stage, as the residual heat will continue to cook the eggs after they’re removed from the water.
Step 2: The Ice Bath – Stopping the Cook
As soon as your timer goes off, it’s imperative to stop the cooking process immediately. This is where the ice bath comes in. Prepare a large bowl filled with ice and cold water. Using your slotted spoon again, carefully transfer the boiled eggs directly from the hot water into the ice bath. Let them chill in the ice bath for at least 10-15 minutes. This rapid cooling not only stops the cooking but also makes the eggs easier to peel. You’ll notice the shells become looser, which is a good sign.
Step 3: Preparing the Marinade
While the eggs are cooling, it’s time to whip up the marinade. In a small saucepan, combine the ½ cup of light sodium soy sauce, ¼ cup of water, ¼ cup of non-non-non-alcoholic alternativeic non-alcoholic mirin, and 2 tablespoons of granulated sugar. Place the saucepan over medium heat and stir gently until the sugar has completely dissolved. You don’t need to bring this mixture to a boil; just warm it enough to dissolve the sugar and allow the flavors to meld. Once dissolved, remove the marinade from the heat and let it cool slightly.
Step 4: Peeling and Marinating the Eggs
Once the eggs are thoroughly chilled and easier to handle, it’s time to peel them. Gently tap each egg on a hard surface and then roll it between your hands to loosen the shell. Start peeling from the wider end, where the air pocket is. If you find peeling difficult, running the egg under cool water can help the shell slide off more easily. After peeling, carefully place the eggs into a resealable bag or a small airtight container.
Pour the slightly cooled marinade over the peeled eggs, ensuring they are completely submerged. If using a bag, squeeze out as much air as possible before sealing. If using a container, make sure the liquid covers the eggs. The marinade needs time to work its magic.
Step 5: The Waiting Game – Flavor Infusion
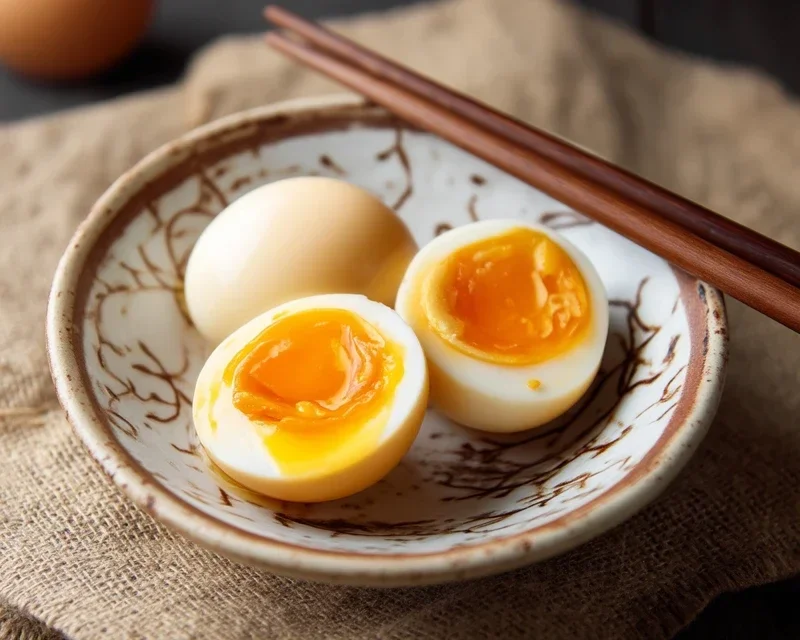
This is where patience is key! For the best flavor, let the ramen eggs marinate in the refrigerator for at least 4 hours, but ideally 12 to 24 hours. The longer they marinate, the deeper the flavor will penetrate the egg white and the yolk will become richer and more infused. Flip the eggs occasionally if they are in a container to ensure even marination. You’ll notice the egg whites start to take on a beautiful amber hue as they absorb the soy sauce.
*Note on Eggs: For optimal results and consistent peeling, I prefer using eggs that are about a week old. Fresher eggs tend to be more difficult to peel.
Enjoy your homemade ramen eggs! They are the perfect topping for any bowl of ramen, but they also make a fantastic addition to salads, onigiri, or even enjoyed on their own.
Conclusion:
There you have it! Crafting perfect ramen eggs, or Ajitama, is surprisingly straightforward and the reward is immense. These marinated soft-boiled eggs are not just a delicious topping; they are a game-changer for any ramen dish. Their rich, savory yolk and tender white, infused with the umami-packed marinade, elevate a simple bowl of noodles into a truly gourmet experience. I encourage you to try this recipe – it’s a fantastic way to add a restaurant-quality touch to your home-cooked meals.
Serving suggestions are plentiful! The most obvious is, of course, in a steaming bowl of ramen. But don’t stop there! These flavorful eggs are also incredible sliced and added to salads, as a protein boost in bento boxes, or even enjoyed on their own as a satisfying snack. For variations, feel free to experiment with your marinade. Adding a splash of non-alcoholic mirin for sweetness, a pinch of chili flakes for a kick, or even a bit of grated gin extractger can create exciting new flavor profiles. Once you master the basic ramen egg, the possibilities are endless!
Frequently Asked Questions about Ramen Eggs (Ajitama):
How long do ramen eggs last in the refrigerator?
Properly stored in their marinade in an airtight container, ramen eggs will typically last for 3-4 days in the refrigerator. The marinade helps to preserve them, but their texture is best enjoyed within that timeframe.
Can I use duck eggs instead of chicken eggs for Ajitama?
Absolutely! Duck eggs have a richer yolk and are larger, so you might need to adjust the boiling time slightly to achieve that perfect jammy consistency. They will absorb the marinade beautifully and add an extra layer of decadence to your ramen eggs.
What is the best way to peel the soft-boiled eggs without breaking them?
The trick to easy peeling is to use slightly older eggs (not super fresh) and to immediately plunge them into an ice bath after boiling. This rapid cooling causes the egg white to contract, separating it from the shell. Gently crack the egg all over and peel under cool running water – it makes a world of difference!
Ramen Eggs (Ajitama)
Perfectly marinated soft-boiled eggs with a creamy yolk and savory, umami-rich flavor, ideal for ramen or as a snack.
Ingredients
-
6 large eggs
-
1/2 cup soy sauce (light sodium)
-
1/4 cup water
-
1/4 cup non-alcoholic mirin
-
2 tablespoons granulated sugar
-
1 tablespoon rice vinegar
Instructions
-
Step 1
Gently lower the eggs into a pot of boiling water (you can add a splash of vinegar to the water to help prevent cracking). Cook for exactly 6.5 to 7 minutes for a jammy yolk. -
Step 2
Immediately transfer the cooked eggs to an ice bath to stop the cooking process. Let them chill for at least 10 minutes. -
Step 3
While the eggs are chilling, whisk together the soy sauce, water, non-alcoholic mirin, granulated sugar, and rice vinegar in a bowl or a resealable bag. -
Step 4
Carefully peel the cooled eggs. Be gentle to avoid damaging the whites. -
Step 5
Place the peeled eggs into the marinade, ensuring they are fully submerged. If using a bag, squeeze out any excess air. -
Step 6
Marinate the eggs in the refrigerator for at least 4 hours, or preferably overnight, turning them occasionally for even marbling.
Important Information
Nutrition Facts (Per Serving)
It is important to consider this information as approximate and not to use it as definitive health advice.
Allergy Information
Please check ingredients for potential allergens and consult a health professional if in doubt.