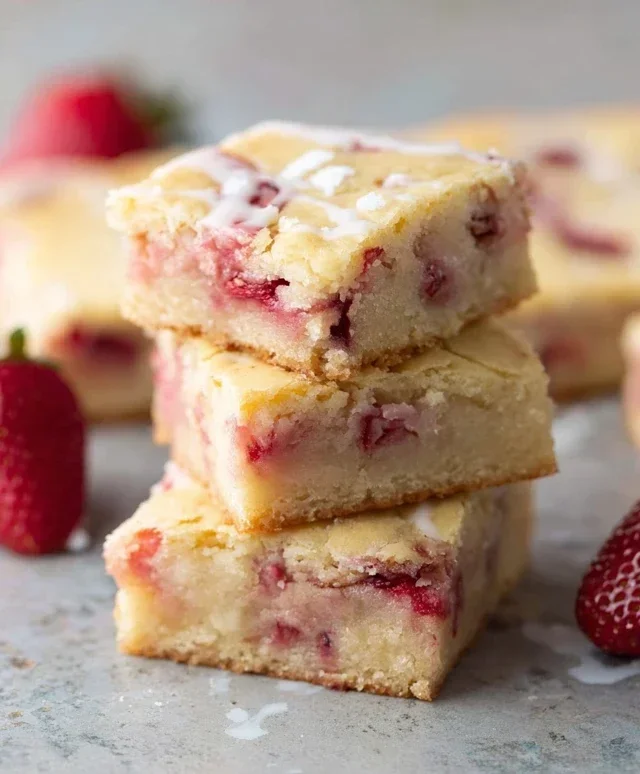
Chocolate Chip Cookie Cheesecake-Delicious Dessert
Chocolate chip cookie bottomed cheesecake is a dessert dream come true, a harmonious marriage of two beloved classics that promises pure bliss in every bite. Imagin extracte this: the impossibly creamy, rich, and decadent texture of a perfectly baked cheesecake, but instead of a traditional grabeef ham cracker crust, you’re met with the delightful chegrape juicess and sweet, buttery crum extractble of a freshly baked chocolate chip cookie. It’s a textural and flavor explosion that has captured the hearts (and taste buds!) of dessert lovers everywhere. We adore this dessert because it offers the best of both worlds – the comforting familiarity of chocolate chip cookies elevated by the sophisticated indulgence of cheesecake. This isn’t just a dessert; it’s an experience, a delightful surprise waiting to unfold with every spoonful. Prepare to fall head over heels for our Chocolate Chip Cookie Bottomed Cheesecake.
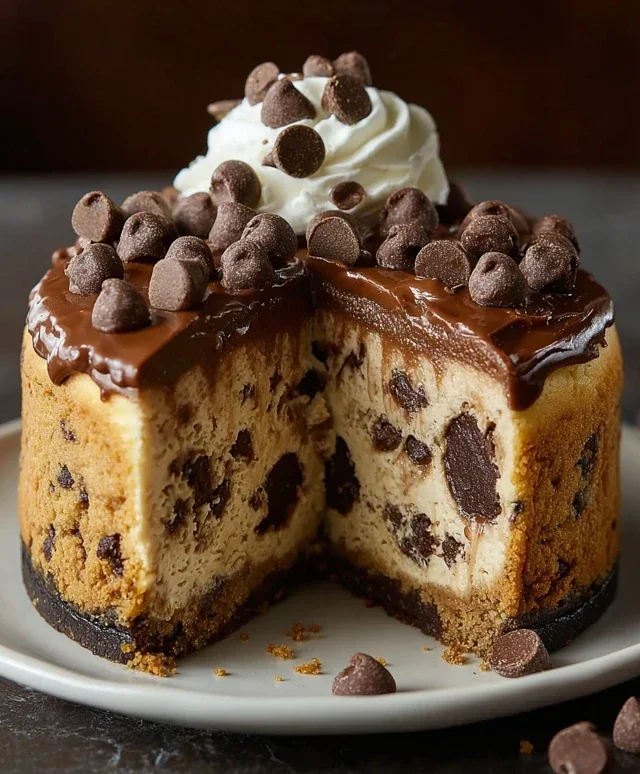
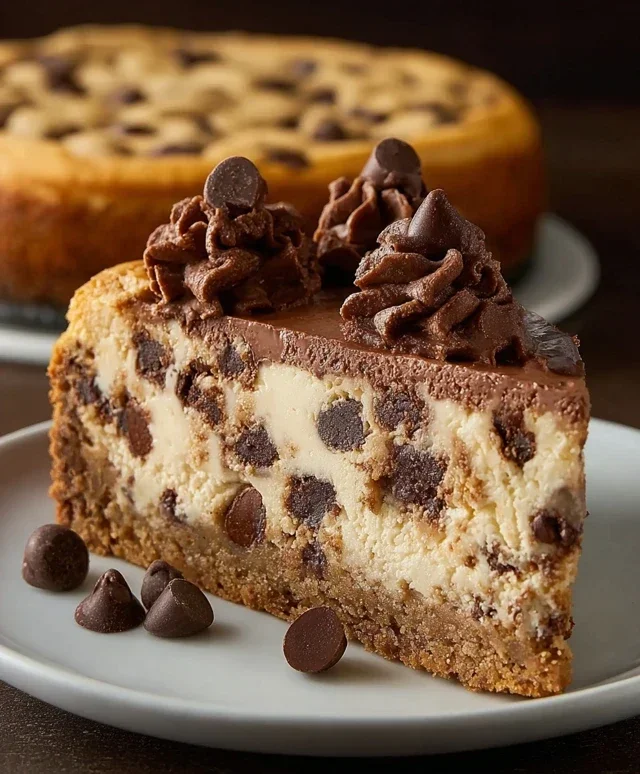
Chocolate Chip Cookie Bottomed Cheesecake
Get ready to experience dessert nirvana with this Chocolate Chip Cookie Bottomed Cheesecake. It’s the ultimate fusion of two beloved treats: a decadent, creamy cheesecake and a chewy, brown-sugar-kissed chocolate chip cookie base. We’re not just talking about a cookie crust here; this is a full-on, flavorful cookie layer that stands proudly beneath a smooth, rich chocolate cheesecake filling. Perfect for celebrations, a special weekend treat, or simply when that sweet craving hits hard, this cheesecake is guaranteed to impress.
Ingredients:
Cookie Dough Base
First, we’ll create that incredible cookie base. In a large mixing bowl, cream together the 112g of room-temperature unsalted butter, 72g of light brown sugar, and 39g of granulated sugar until light and fluffy. This is crucial for a tender cookie texture. Next, beat in the egg and 1 1/2 teaspoons of vanilla extract until well combined. In a separate medium bowl, whisk together the 195g of all-purpose flour, 3/4 teaspoon of baking soda, 1/4 teaspoon of baking powder, and 1/4 teaspoon of salt. Gradually add the dry ingredients to the wet ingredients, mixing on low speed until just combined. Be careful not to overmix, as this can lead to tough cookies. Finally, gently fold in the 211g of semi-sweet chocolate chips. The dough will be thick and studded with delicious chocolate chips. Press this cookie dough evenly into the bottom of a 9-inch springform pan. Ensure it forms a compact, even layer, as this will be the foundation of our cheesecake. We’re looking for about a 1/4-inch thick layer. Pop the pan into the freezer for about 15-20 minutes while we prepare the cheesecake filling. This chilling step helps the cookie base firm up and prevents it from mixing too much with the cheesecake batter.
Chocolate Cheesecake Filling
Now, for the star of the show: the rich, chocolate cheesecake filling. In a large bowl, beat the 565g of room-temperature cream cheese until it’s completely smooth and free of lumps. This is the most important step for a silky-smooth cheesecake, so take your time and scrape down the sides of the bowl often. Add the 104g of granulated sugar and the 35g of natural unsweetened cocoa powder to the cream cheese. Beat on low speed until just combined, then increase the speed to medium and beat until everything is smooth and creamy. Stir in the remaining 1 teaspoon of vanilla extract. Ensure there are no streaks of cream cheese or cocoa powder remaining. Lastly, gently fold in the 42g of melted semi-sweet chocolate chips. You want just enough mixing to distribute the melted chocolate without overworking the batter. The goal is a luxurious, intensely chocolatey filling.
Assembly and Baking
Preheat your oven to 325°F (160°C). Remove the springform pan with the chilled cookie dough base from the freezer. Carefully spoon the chocolate cheesecake filling evenly over the cookie dough layer. Gently smooth the top with a spatula.
To ensure even cooking and prevent cracking, we’ll use a water bath. Wrap the bottom of the springform pan tightly with several layers of heavy-duty aluminum foil to prevent any water from seeping in. Place the wrapped springform pan inside a larger baking pan (like a roasting pan). Carefully pour hot water into the larger baking pan until it comes about halfway up the sides of the springform pan. This gentle, moist environment will cook the cheesecake slowly and evenly, resulting in a creamy texture and minimizing the risk of cracks.
Carefully transfer the water bath setup into the preheated oven. Bake for 60-75 minutes, or until the edges of the cheesecake are set and the center is still slightly jiggly when you gently nudge the pan. The cookie base should be golden brown and set. Don’t be tempted to overbake; a slight wobble is exactly what you want.
Once baked, carefully remove the springform pan from the water bath. Remove the aluminum foil. Let the cheesecake cool completely on a wire rack. This is another crucial step for proper setting. Resist the urge to slice into it too soon. Once it has cooled to room temperature, cover the cheesecake loosely with plastic wrap and refrigerate for at least 6 hours, or preferably overnight. This chilling period allows the cheesecake to fully firm up and the flavors to meld beautifully.
Before serving, carefully run a thin knife around the edge of the springform pan to loosen the cheesecake, then unlatch and remove the sides of the pan. Slice with a sharp knife dipped in hot water and wiped dry between each cut for clean slices. Garnish with extra chocolate chips, a dollop of whipped cream, or a dusting of cocoa powder if desired. Enjoy this incredible creation that perfectly marries the chegrape juicess of a cookie with the richness of cheesecake!
Conclusion:
I hope you’re as excited as I am about this incredible Chocolate Chip Cookie Bottomed Cheesecake! This recipe truly elevates the classic cheesecake experience by marrying the creamy, decadent richness of a no-bake cheesecake filling with the irresistible, slightly chewy texture of a perfectly baked chocolate chip cookie base. It’s the best of both worlds, offering a delightful contrast in textures and flavors that will have everyone asking for seconds. This dessert is surprisingly straightforward to make, making it an excellent choice for both novice bakers and seasoned pros looking for a show-stopping treat.
When it comes to serving, this cheesecake is divine on its own, but it also pairs beautifully with fresh berries, a drizzle of raspberry coulis, or even a dollop of whipped cream. For a touch of indulgence, consider a warm chocolate ganache. Looking for variations? You can absolutely experiment! Swap out the chocolate chips for white chocolate, butterscotch, or even add a handful of chopped nuts to the cookie base. For a richer flavor, try adding a teaspoon of espresso powder to the cheesecake filling. I truly encourage you to give this Chocolate Chip Cookie Bottomed Cheesecake a try; it’s a guaranteed crowd-pleaser and a fantastic way to impress your guests or simply treat yourself!
Frequently Asked Questions:
Can I bake the cookie bottom instead of pressing it?
While this recipe is designed for a no-bake cheesecake with a pressed cookie bottom, you could technically pre-bake the cookie dough before adding the cheesecake filling. If you choose to do this, make sure to bake it until it’s firm but not overly brown, as it will continue to set with the cheesecake. This will result in a firmer, more cake-like crust.
How should I store leftover cheesecake?
Leftover Chocolate Chip Cookie Bottomed Cheesecake should be stored in an airtight container in the refrigerator. It will keep well for up to 3-4 days. The flavors often meld and deepen beautifully after the first day!
Can I make this cheesecake dairy-free or vegan?
Yes, you can adapt this recipe to be dairy-free or vegan with a few ingredient substitutions. For the cookie bottom, use vegan butter and dairy-free chocolate chips. For the cheesecake filling, opt for a base of soaked cashews or a plant-based cream cheese alternative, along with full-fat coconut milk or a dairy-free yogurt. Ensure your condensed milk substitute is also vegan. The texture might vary slightly, but the deliciousness will remain!
Chocolate Chip Cookie Bottomed Cheesecake
A decadent cheesecake featuring a rich chocolate chip cookie crust, topped with a creamy, chocolate-infused cheesecake filling.
Ingredients
-
112g unsalted butter, room temperature
-
72g light brown sugar
-
39g sugar
-
1 egg
-
1 1/2 tsp vanilla extract
-
195g all-purpose flour
-
3/4 tsp baking soda
-
1/4 tsp baking powder
-
1/4 tsp salt
-
211g semi-sweet chocolate chips
-
565g cream cheese, room temperature
-
104g sugar
-
35g natural unsweetened cocoa powder
-
1 tsp vanilla extract
-
42g semi-sweet chocolate chips, melted
Instructions
-
Step 1
Preheat oven to 350°F (175°C). Line the bottom of a 9-inch springform pan with parchment paper. -
Step 2
In a bowl, cream together 112g unsalted butter, 72g light brown sugar, and 39g sugar until light and fluffy. Beat in 1 egg and 1 1/2 tsp vanilla extract. -
Step 3
In a separate bowl, whisk together 195g all-purpose flour, 3/4 tsp baking soda, 1/4 tsp baking powder, and 1/4 tsp salt. Gradually add the dry ingredients to the wet ingredients, mixing until just combined. Stir in 211g semi-sweet chocolate chips. -
Step 4
Press the cookie dough evenly into the bottom of the prepared springform pan to form the crust. Bake for 10-12 minutes until lightly golden. Remove from oven and let cool slightly. -
Step 5
In a large bowl, beat 565g cream cheese until smooth. Gradually beat in 104g sugar and 35g natural unsweetened cocoa powder until well combined. Stir in 1 tsp vanilla extract. -
Step 6
Pour the cheesecake filling over the cookie crust. Smooth the top with a spatula. -
Step 7
Bake for 50-60 minutes, or until the edges are set and the center is still slightly jiggly. Turn off the oven, crack the door open, and let the cheesecake cool in the oven for 1 hour. -
Step 8
Remove from the oven and cool completely on a wire rack. Chill in the refrigerator for at least 4 hours, or overnight. -
Step 9
Drizzle the melted 42g semi-sweet chocolate chips over the top before serving.
Important Information
Nutrition Facts (Per Serving)
It is important to consider this information as approximate and not to use it as definitive health advice.
Allergy Information
Please check ingredients for potential allergens and consult a health professional if in doubt.