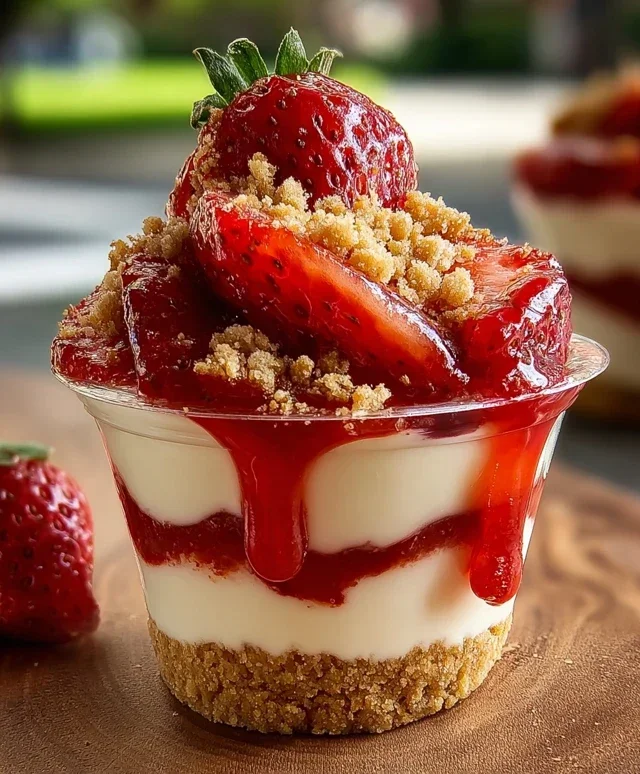
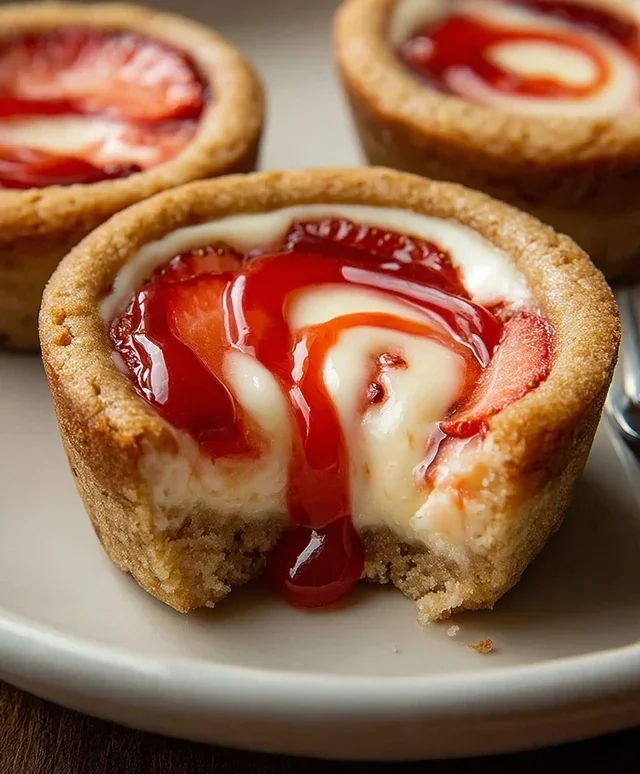
Strawberry Swirl Cheesecake Cookie Cups Delight
Strawberry Swirl Cheesecake Cookie Cups are an absolute game-changer for anyone who loves the best of both worlds! Imagin extracte sinking your teeth into the rich, buttery embrace of a perfectly baked cookie, only to discover a luscious, creamy cheesecake center kissed with vibrant swirls of sweet strawberry goodness. It’s the ultimate dessert mashup, and frankly, I’m obsessed. Why do we adore these little delights? Because they deliver that satisfying cookie crunch alongside the dreamy, decadent texture of cheesecake. What truly sets these Strawberry Swirl Cheesecake Cookie Cups apart is their adorable, individual format, making them perfect for parties, a special treat, or just when you need a little slice of heaven all to yourself. Get ready to impress yourself and everyone you share these with!
Strawberry Swirl Cheesecake Cookie Cups
Get ready for a dessert that’s the best of both worlds! These Strawberry Swirl Cheesecake Cookie Cups are incredibly easy to make and taste like a little slice of heaven. Imagin extracte the soft, chewy goodness of a sugar cookie embracing a creamy, tangy cheesecake filling, all swirled with vibrant strawberry flavor. They’re perfect for parties, bake snon-alcoholic ales, or just a special treat for yourself. The beauty of these cookie cups is their individual portion size and how delightful they look with that pretty pink swirl. We’re going to take a simple sugar cookie dough and transform it into these stunning little desserts. No fancy decorating skills needed – the swirl does all the work!
Ingredients:
Getting Started: Preparing the Cookie Cups
First things first, let’s get our cookie cups ready to hold that delicious cheesecake filling. You’ll need a mini muffin tin for this recipe. The small size is perfect for these bite-sized treats. If you don’t have a mini muffin tin, a standard muffin tin will work, but the cookie cups will be larger and might require slightly longer baking times.
Preheat your oven to 350°F (175°C). Lightly grease your mini muffin tin with cooking spray or butter. This step is crucial to ensure your cookie cups don’t stick, making them easy to remove once baked. You can also use mini cupcake liners if you prefer, but I find greasing the tin directly gives the best texture.
Open your roll of refrigerated sugar cookie dough. If you’re using homemade dough, make sure it’s chilled and ready to go. You want the dough to be firm enough to handle. Take small portions of the cookie dough, about 1 to 1.5 tablespoons each, and press them evenly into the bottom and up the sides of each cup in your mini muffin tin. The goal is to create a thin, even layer that will form the “cup” for the cheesecake filling. Don’t make the walls too thick, or the cookie part might be doughy. You want a nice balance between cookie and filling. Ensure the dough is pressed all the way to the bottom so there are no holes.
Crafting the Creamy Cheesecake Filling
Now for the star of the show – the luscious cheesecake filling! This part is incredibly simple and comes together in minutes. The key is to make sure your cream cheese is properly softened. This will prevent any lumps and ensure a smooth, creamy texture.
In a medium bowl, combine the softened cream cheese and granulated sugar. Use an electric mixer (handheld or stand mixer) to beat the cream cheese and sugar together until the mixture is smooth and creamy, with no lumps of cream cheese remaining. This usually takes about 2-3 minutes. Scrape down the sides of the bowl as needed to ensure everything is incorporated.
Add the vanilla extract to the cream cheese mixture and beat again until just combined. Be careful not to overmix at this stage, as it can sometimes make the filling too thin. The mixture should be thick and smooth, resembling a nice, rich frosting.
Assembling and Swirling the Magic
This is where the fun begin extracts! We’re going to combine the cookie cups with the cheesecake filling and add that beautiful strawberry swirl. Warming the jam slightly makes it easier to swirl and helps it spread through the filling more evenly.
Spoon about 1 to 1.5 tablespoons of the cheesecake filling into each prepared cookie cup. Don’t fill them all the way to the very top, as the filling will puff up slightly while baking. Leave a little room for the jam swirl.
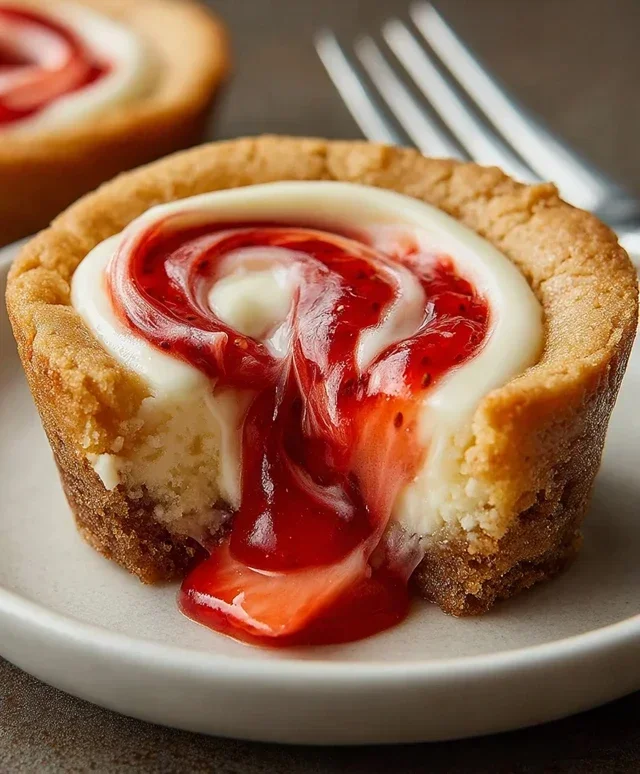
Now for the artistic part! Drizzle about 1 teaspoon of the warmed strawberry jam over the top of each cheesecake-filled cookie cup. Use a toothpick or a small knife to gently swirl the jam into the cheesecake filling. Create a marbling effect by draggin extractg the toothpick through the jam and filling in a random pattern. This creates that signature “swirl” and adds a burst of fruity flavor. Don’t over-swirl, or the colors will blend too much. Just a few gentle passes are all you need to create a beautiful design.
Baking and Finishing Touches
The final steps involve baking these beauties to perfection and adding any optional garnishes. Keep an eye on them in the oven to prevent burning.
Bake in the preheated oven for 15-20 minutes, or until the edges of the cookie cups are golden brown and the cheesecake filling is set. The center might still look a little soft, but it will continue to set as it cools. Overbaking can lead to a dry cookie and a tough filling, so it’s better to err on the side of slightly underbaked.
Once baked, let the cookie cups cool in the muffin tin for about 5-10 minutes. This allows them to firm up before you try to remove them. After the initial cooling in the tin, carefully remove the cookie cups from the muffin tin and transfer them to a wire rack to cool completely. If you find they are sticking, you can run a thin, sharp knife around the edges to loosen them.
Before serving, you can add optional garnishes. A fresh strawberry slice on top adds a beautiful pop of color and freshness. Alternatively, a sprinkle of chocolate shavings can complement the sweetness of the cookie and the tang of the cheesecake. These Strawberry Swirl Cheesecake Cookie Cups are best enjoyed at room temperature or slightly chilled. You can store any leftovers in an airtight container in the refrigerator for up to 3 days. Enjoy every delightful bite!
Conclusion:
There you have it – the ultimate guide to creating delightful Strawberry Swirl Cheesecake Cookie Cups! These little bites of heaven are a fantastic way to combine the best of two beloved desserts: the rich, creamy texture of cheesecake and the satisfying chegrape juicess of a classic cookie. The vibrant swirl of strawberry adds a beautiful visual appeal and a burst of fruity flavor that perfectly complements the sweet, tangy cream cheese filling. I truly believe these Strawberry Swirl Cheesecake Cookie Cups are a winner for any occasion, whether it’s a casual get-together, a special celebration, or simply a treat for yourself.
When it comes to serving, these cookie cups are wonderfully versatile. They’re perfect for dessert tables, potlucks, or as an individual indulgence with a cup of coffee or tea. For an extra touch of elegance, consider garnishing them with a fresh strawberry slice or a dollop of whipped cream. Don’t be afraid to get creative with variations! You could try using other berry purees like raspberry or blueberry, or even a chocolate ganache swirl for a decadent twist. I encourage you all to give this recipe a try; I’m confident you’ll fall in love with these charming and delicious treats just as much as I have!
Frequently Asked Questions:
How do I prevent the cookie cups from sticking to the muffin tin?
To ensure your Strawberry Swirl Cheesecake Cookie Cups release smoothly, it’s crucial to properly grease and flour your muffin tin. You can also use muffin liners, though this might slightly alter the cookie’s crispiness on the bottom. Allowing the cookie cups to cool completely in the tin before attempting to remove them is another key step in preventing sticking.
Can I make the cheesecake filling ahead of time?
Absolutely! The cheesecake filling can be prepared up to 24 hours in advance and stored in an airtight container in the refrigerator. This is a great way to save time when you’re ready to assemble and bake your cookie cups. Just give it a quick stir before adding it to the cookie dough.
What is the best way to store leftover cookie cups?
Leftover Strawberry Swirl Cheesecake Cookie Cups are best stored in an airtight container in the refrigerator. They will keep well for up to 3-4 days. You can enjoy them chilled or bring them to room temperature for a softer cookie base.
Strawberry Swirl Cheesecake Cookie Cups
Delectable cookie cups featuring a buttery sugar cookie base swirled with a creamy cheesecake filling and a burst of strawberry.
Ingredients
-
1 roll (16.5 oz) refrigerated sugar cookie dough or homemade equivalent
-
8 oz cream cheese, softened
-
1/4 cup granulated sugar
-
1 tsp vanilla extract
-
1/3 cup strawberry jam, warmed slightly
-
Fresh strawberries or chocolate shavings (optional)
Instructions
-
Step 1
Preheat your oven to 350°F (175°C). Lightly grease a mini muffin tin. -
Step 2
Press about 1 tablespoon of sugar cookie dough into the bottom and up the sides of each mini muffin cup, creating a shell. -
Step 3
In a medium bowl, beat together the softened cream cheese and granulated sugar until smooth. Stir in the vanilla extract. -
Step 4
Spoon about 1 teaspoon of the cream cheese mixture into each cookie dough cup. -
Step 5
Dollop about 1/2 teaspoon of warmed strawberry jam onto the cream cheese filling in each cup. Use a toothpick to gently swirl the jam into the cream cheese. -
Step 6
Bake for 12-15 minutes, or until the cookie edges are golden brown and the cream cheese filling is set. -
Step 7
Let the cookie cups cool in the muffin tin for a few minutes before carefully removing them to a wire rack to cool completely. Garnish with fresh strawberries or chocolate shavings, if desired.
Important Information
Nutrition Facts (Per Serving)
It is important to consider this information as approximate and not to use it as definitive health advice.
Allergy Information
Please check ingredients for potential allergens and consult a health professional if in doubt.