Easy Pickled Red Onions- Quick & Flavorful Recipe
Pickled Red Onions are an absolute game-changer in my kitchen, and I’m willing to bet they’ll become one in yours too. Seriously, these vibrant, tangy jewels have the power to elevate the most humble of meals into something extraordinary. Think about it: that perfectly grilled burger, a simple avocado toast, a fresh salad that’s just beggin extractg for a little zing – a sprinkle of these gorgeous crimson slivers transforms them instantly. People adore pickled red onions not just for their stunning visual appeal, which adds a burst of color to any dish, but for that irresistible sweet and sour punch that cuts through richness and adds a refreshing counterpoint. What truly makes them special is how easy they are to make and how incredibly versatile they are. Within minutes, you can create a condiment that adds a sophisticated, bright note to almost anything. Let’s dive into how to create this kitchen essential!
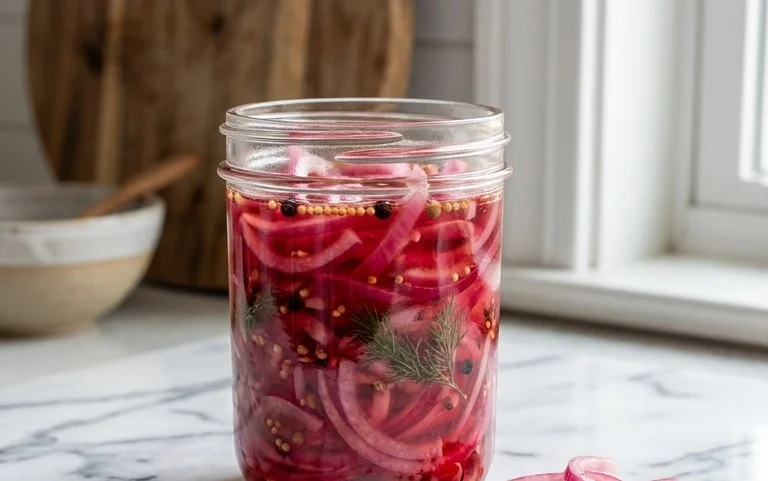
Pickled Red Onions
There’s a reason why pickled red onions have become a ubiquitous topping for everything from tacos and avocado toast to burgers and salads. Their vibrant pink hue is as appealing as their tangy, slightly sweet, and crisp flavor. They add a delightful punch that elevates even the simplest of dishes. What’s even better? They are incredibly easy to make at home, requiring just a handful of pantry staples and a few minutes of your time. Forget those store-bought versions that can sometimes be overly vinegary or lacking in flavor. Making your own allows you to control the sweetness and saltiness, ensuring a perfect balance every time. This recipe is my go-to, and I’m excited to share it with you so you can start enjoying these flavor bombs in your own kitchen.
Ingredients:
Instructions:
1. Preparing the Onion
The first step is to get your red onion ready. For the best results, I like to use a large red onion. Start by peeling off the papery outer skin. Then, you’ll want to slice the onion very thinly. The thinner the slices, the more surface area there is for the pickling liquid to penetrate, which means a quicker and more even pickle. A mandoline slicer is excellent for achieving uniform, paper-thin slices, but if you don’t have one, a sharp knife and a steady hand will work just fine. Aim for slices that are about 1/8-inch thick. Once sliced, I like to separate the rings slightly. This helps them absorb the brine more effectively. If you’re finding it difficult to separate, don’t worry too much, as they’ll loosen up as they pickle.
2. Creating the Pickling Brine
While your onion slices are waiting, it’s time to make the magic happen with the brine. In a small saucepan, combine the white vinegar and water. White vinegar is my preference here because it has a clean, sharp flavor that allows the onion to shine, but you could experiment with apple cider vinegar for a slightly fruitier note if you’re feeling adventurous. Add the sugar and kosher salt to the liquid. Kosher salt is ideal because its larger crystals dissolve nicely without making the brine too salty. Stir everything together over medium heat. You don’t need to bring it to a rolling boil; just heat it enough to dissolve the sugar and salt completely. Once those are dissolved, remove the saucepan from the heat. The goal is a well-combined, flavorful liquid that will transform those raw onion slices.
3. Combining Onion and Brine
Now comes the exciting part! Take your thinly sliced red onion rings and place them into a clean, heat-safe jar or bowl. Make sure the container is large enough to hold all the onions and the brine comfortably. Once your brine has cooled slightly (you don’t want it boiling hot when it hits the onions, as this can sometimes make them a bit mushy), carefully pour it over the sliced onions. Ensure that all the onion slices are fully submerged in the liquid. This is crucial for even pickling. If some slices are floating, gently press them down with a spoon or another clean utensil. You’ll notice the onions immediately start to change color as the brine begin extracts its work, a visual testament to the pickling process.
4. The Waiting Game: Infusing Flavor
This is where patience truly pays off. Cover the jar or bowl tightly and let it sit at room temperature for at least 30 minutes. This initial period at room temperature allows the onions to start absorbing the flavors and the acid begin extracts to soften them. After 30 minutes, you’ll already notice a significant change in their texture and color. For a more pronounced pickle flavor and a softer texture, I like to transfer the container to the refrigerator. The longer they sit in the brine, the more pickled they will become. For a quick pickle, an hour or two in the fridge is often enough for many uses. However, I find that leaving them overnight in the refrigerator yields the best results, allowing the flavors to fully meld and the onions to achieve that perfect tender-crisp texture. They will continue to soften and deepen in flavor the longer they are stored.
5. Storage and Enjoyment
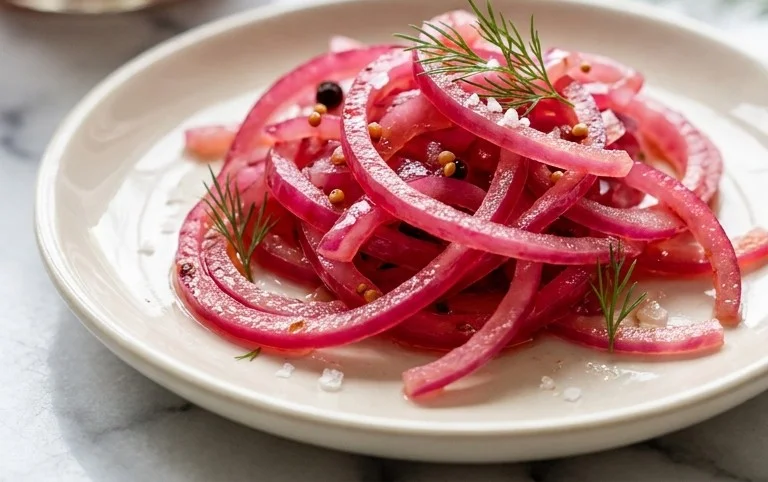
Once your pickled red onions have reached your desired level of pickling, they are ready to be enjoyed! You can use them immediately, or store them in the refrigerator. They will keep well in an airtight container in the fridge for at least two to three weeks, and often longer. The vibrant pink color will intensify over time, making them even more visually appealing. Don’t discard the pickling liquid! It’s packed with flavor and can be used in salad dressings, marinades, or even as a base for another batch of quick pickles. To use them, simply drain them from the brine. They are incredibly versatile. Sprinkle them generously over your favorite tacos, add them to your breakfast eggs, top off a gourmet burger, or toss them into a vibrant salad for an instant flavor boost. The possibilities are endless, and their bright, tangy presence will undoubtedly become a staple in your culinary repertoire.
Conclusion:
I hope you’re as excited to whip up a batch of these vibrant pickled red onions as I am to eat them! This recipe is truly a game-changer for elevating everyday meals. The perfect balance of tang, sweetness, and that beautiful magenta hue makes them incredibly versatile. They’re not just a condiment; they’re a flavor enhancer that can transform a simple taco, salad, or sandwich into something spectacular. Plus, they’re remarkably easy to make, requiring minimal effort for maximum deliciousness. Don’t be shy – give these pickled red onions a try! I’m confident you’ll find yourself reaching for them again and again.
Think outside the box with your serving suggestions! Beyond the obvious taco toppings and salad additions, try them on burgers, avocado toast, scrambled eggs, or even alongside grilled fish or chicken. The possibilities are truly endless.
Feeling adventurous? Experiment with variations! Add a pinch of red pepper flakes for a little heat, a sprig of fresh dill or thyme for an herbal twist, or swap some of the sugar for honey for a different kind of sweetness. The base recipe is so forgiving, allowing you to tailor it to your personal preferences.
Frequently Asked Questions:
How long do pickled red onions last?
When stored properly in an airtight container in the refrigerator, these pickled red onions will stay delicious for about 2-3 weeks. The longer they sit, the more their flavor deepens and mellows.
Can I use a different type of onion?
While red onions are ideal for their color and milder flavor, you can experiment with white or yellow onions. However, the iconic vibrant pink color will be absent, and the flavor profile will be slightly different.
What if I don’t have apple cider vinegar?
White vinegar or red grape juice vinegar can be substituted in a pinch, though apple cider vinegar offers a wonderfully balanced tang and subtle sweetness that complements the red onions beautifully.
Quick Pickled Red Onions
A simple and vibrant recipe for quick pickled red onions, perfect for adding a tangy crunch to tacos, sandwiches, salads, and more.
Ingredients
-
1 large Red onion, thinly sliced
-
1 cup White Vinegar
-
1 cup Water
-
1 tablespoon Granulated Sugar
-
2 teaspoons Kosher Salt
Instructions
-
Step 1
Thinly slice the red onion. A mandoline slicer is helpful for uniform slices. -
Step 2
In a small saucepan, combine the white vinegar, water, granulated sugar, and kosher salt. -
Step 3
Heat the mixture over medium heat, stirring until the sugar and salt are completely dissolved. Do not boil. -
Step 4
Place the sliced red onion into a heatproof jar or bowl. -
Step 5
Pour the hot pickling liquid over the sliced onions, ensuring they are fully submerged. -
Step 6
Let the onions sit at room temperature for at least 30 minutes, or until they have softened and turned bright pink. For a more intense pickle, let them sit longer. -
Step 7
Once cooled slightly, transfer the pickled red onions and their brine to an airtight container and refrigerate. They will keep for several weeks.
Important Information
Nutrition Facts (Per Serving)
It is important to consider this information as approximate and not to use it as definitive health advice.
Allergy Information
Please check ingredients for potential allergens and consult a health professional if in doubt.