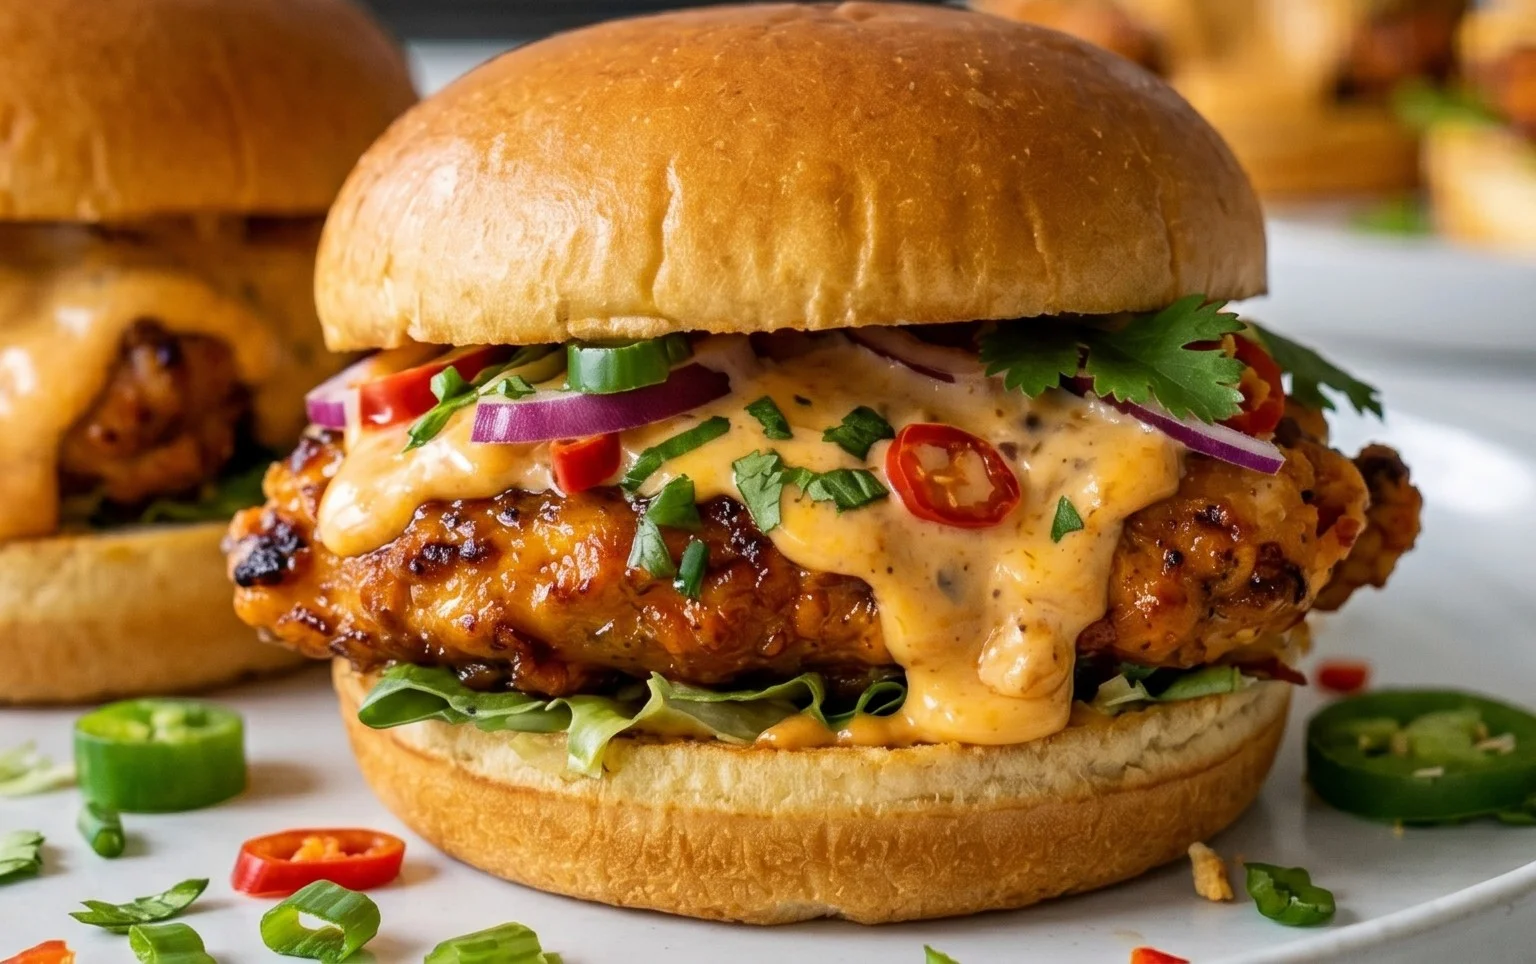
Cheesy Dynamite Chicken Buns-Spicy Flavor Explosion
Cheesy Dynamite Chicken Buns are about to become your new obsession! If you’ve ever craved a bite that’s a perfect harmony of tender, spicy chicken nestled within a pillowy soft bun, then you’re in for a treat. We all know the universal love for a good cheesy bite, and these Cheesy Dynamite Chicken Buns deliver that in spades. But what truly sets these apart is the exhilarating “dynamite” kick – a flavorful heat that awakens your taste buds without overwhelming them, perfectly balanced by the creamy, molten cheese and the comforting embrace of the bun. Imagin extracte the satisfying squish as you sink your teeth into this masterpiece, a burst of savory, spicy, and cheesy goodness all at once. They’re ideal for game nights, quick lunches, or when you simply need a little something extraordinary to brighten your day. Get ready to create some serious culinary magic with these Cheesy Dynamite Chicken Buns!
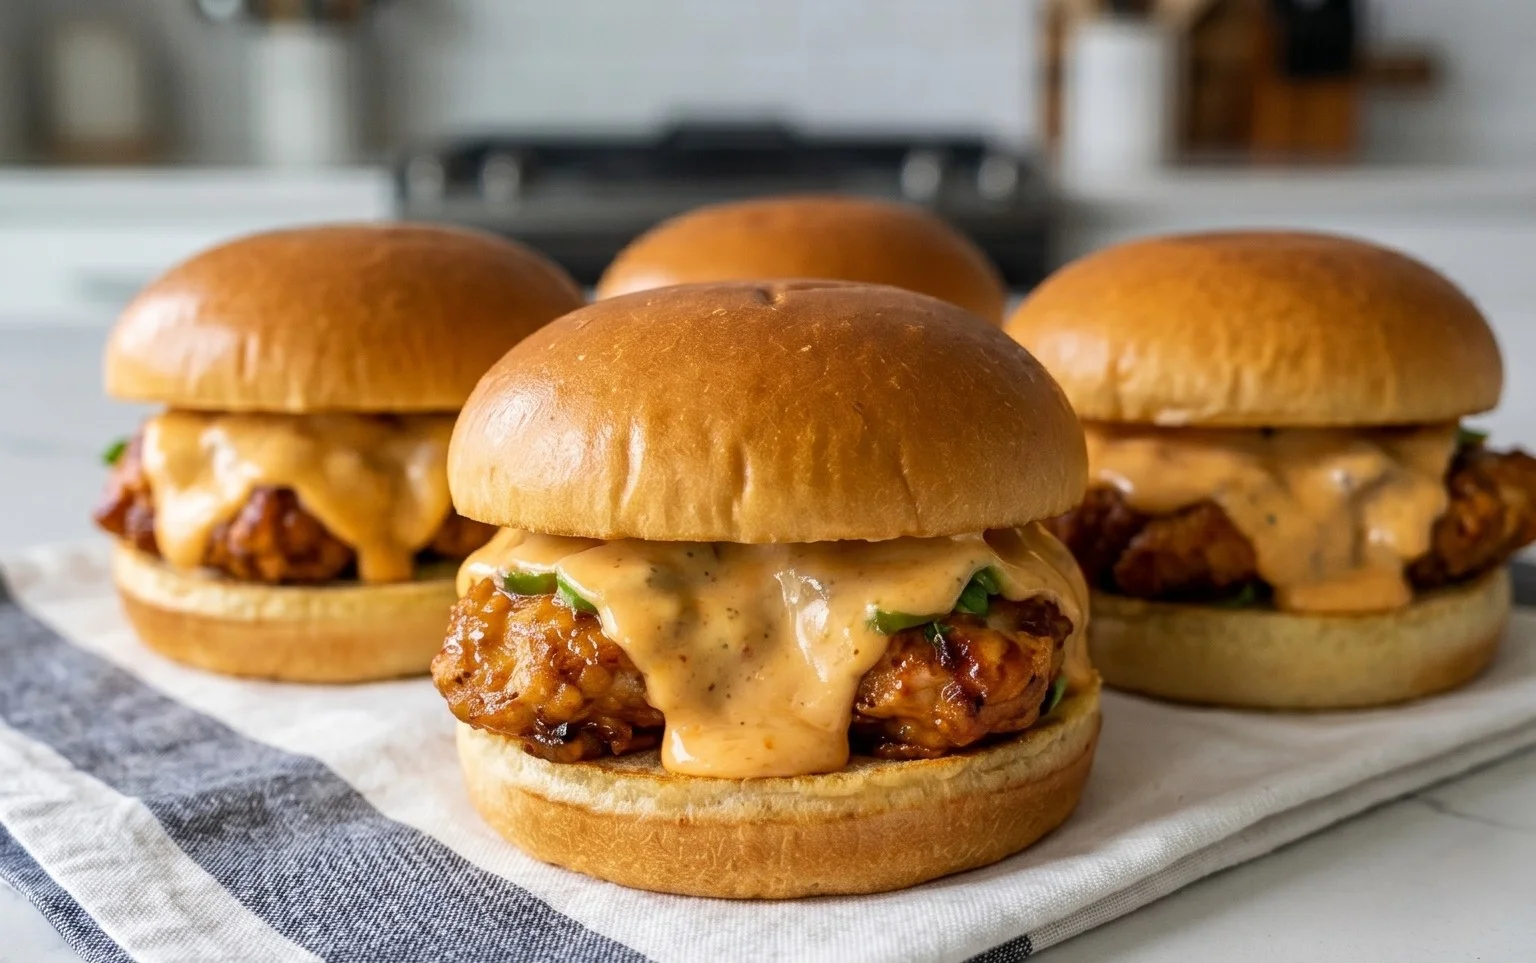
Cheesy Dynamite Chicken Buns
Get ready to experience a flavor explosion with these Cheesy Dynamite Chicken Buns! Imagin extracte fluffy, slightly sweet dough encasing tender, spicy chicken, all brought together with a generous cheesy kick. These buns are perfect for a satisfying snack, a fun appetizer, or even a unique addition to your lunchbox. We’re going to break down the process into easy-to-follow steps, and trust me, the results are absolutely worth it.
Ingredients:
The Dough: Building the Fluffy Foundation
Let’s start with the foundation of our delicious buns – the dough. The key to a perfectly soft and airy bun is the right liquid ratio and gentle handling.
Step 1: Activating the Yeast
In a medium-sized bowl, combine the 75 ml of lukewarm water, 200 ml of milk, and 15 g of honey. Gently stir to dissolve the honey. Now, sprinkle in the 9 g of instant yeast. Give it a quick stir and let it sit for about 5-10 minutes. You should see it get foamy and bubbly on top. This “proofing” step tells us the yeast is alive and ready to work its magic, creating that lovely lift in our dough. If you don’t see foam, your yeast might be old, and it’s best to start again with fresh yeast.
Step 2: Creating the Dough Base
In a large mixing bowl, combine the 600 g of flour and 8 g of salt. Make a well in the center of the dry ingredients. Once your yeast mixture is foamy, pour it into the well along with 1 egg and 30 ml of sunflower oil. Begin extract to mix everything together with a spoon or a spatula until a shaggy dough starts to form. Don’t worry if it looks a bit sticky at this stage.
Step 3: Kneading for Texture
Turn the dough out onto a lightly floured surface. Now comes the fun part – kneading! This develops the gluten, which gives our buns their structure and chew. Knead the dough for about 8-10 minutes, pushing it away from you with the heel of your hand, then folding it back towards you. Continue this process until the dough is smooth, elastic, and no longer excessively sticky. You should be able to poke it with your finger and have the indentation spring back slowly. If it’s too sticky, add a tiny bit more flour, just a tablespoon at a time. Conversely, if it feels too dry, dampen your hands slightly and continue kneading.
Step 4: First Rise – Letting the Dough Relax
Lightly grease the mixing bowl with a little more sunflower oil. Place the kneaded dough into the bowl, turning it to coat it lightly with oil. Cover the bowl tightly with plastic wrap or a damp kitchen towel. Find a warm, draft-free spot in your kitchen for the dough to rise. Let it rise for about 1 to 1.5 hours, or until it has doubled in size. This is where the yeast gets to work, producing gases that make the dough light and airy. Patience is key here; a good rise makes a world of difference!
The Dynamite Chicken Filling: Bringin extractg the Heat
While our dough is doing its thing, let’s prepare the star of the show – the dynamite chicken filling. This is where the “dynamite” comes in with a gentle warmth and savory depth.
Step 5: Preparing the Chicken
Take your 700 g of chicken filet and cut it into small, bite-sized pieces. In a bowl, season the chicken with 5 g of salt, 2 g of cayenne powder, 1.5 g of onion powder, and 1 g of black pepper powder. Mix everything well to ensure each piece of chicken is evenly coated. The cayenne powder will give it that characteristic “dynamite” kick, so adjust the amount slightly if you prefer more or less heat.
Assembling and Baking: The Grand Finnon-alcoholic ale
Now that our dough has risen beautifully and our chicken is seasoned, it’s time to bring it all together.
Step 6: Shaping the Buns
Once the dough has doubled in size, gently punch it down to release the air. Turn the dough out onto a lightly floured surface again. Divide the dough into equal portions, about 10-12 pieces, depending on your desired bun size. Take each portion of dough and flatten it into a disc. Place a generous amount of the seasoned chicken filling in the center of each disc. Now, carefully bring the edges of the dough up and pinch them together to fully enclose the chicken. Roll the dough into a smooth ball, ensuring there are no gaps where the filling could escape. Place the formed buns onto a baking sheet lined with parchment paper, leaving some space between them as they will expand.
Step 7: The Cheesy Topping
In a small bowl, melt the 25 g of butter. Stir in the 40 g of Parmesan cheese until well combined. This cheesy butter mixture is going to give our buns a golden, irresistible crust. Brush a generous amount of this cheesy butter over the top of each bun.
Step 8: Second Rise and Baking to Perfection
Cover the baking sheet with a clean kitchen towel and let the buns rest for another 20-30 minutes. This second rise helps them become even more pillowy. While the buns are resting, preheat your oven to 180°C (350°F). Once the buns have had their second rise, carefully place the baking sheet into the preheated oven. Bake for 18-22 minutes, or until the buns are golden brown and cooked through. You’ll know they’re ready when they sound hollow when tapped on the bottom.
Let your Cheesy Dynamite Chicken Buns cool slightly on a wire rack before serving. The aroma that fills your kitchen will be incredible, and the taste? Pure bliss! Enjoy the perfect balance of soft dough, spicy chicken, and savory cheese in every bite.
Conclusion:
There you have it – your guide to creating these incredibly satisfying Cheesy Dynamite Chicken Buns! This recipe truly hits all the right notes: a delightful blend of tender, flavorful chicken, a kick of spice from the dynamite sauce, and the irresistible gooeyness of melted cheese, all nestled within a soft, pillowy bun. They’re perfect for a fun family dinner, a crowd-pleasing appetizer for your next gathering, or even a special treat for yourself. I truly hope you give these Cheesy Dynamite Chicken Buns a try; they are a guaranteed hit and so much fun to make!
For serving, I love to pair them with a crisp, refreshing side salad to balance the richness, or even some extra hot sauce on the side for those who crave an even bigger kick. You can also customize them to your heart’s content! Consider adding some finely chopped green onions for freshness, a sprinkle of sesame seeds for texture, or even a different type of cheese like Monterey Jack for an extra creamy melt. Don’t be afraid to experiment and make them your own!
Frequently Asked Questions:
Can I make the dynamite sauce spicier or milder?
Absolutely! The beauty of homemade sauce is customization. For a milder sauce, reduce the amount of sriracha or your preferred chili sauce. You can also add a touch more mayonnaise or a little honey to temper the heat. For an extra spicy kick, increase the sriracha, add a dash of cayenne pepper, or even a finely minced jalapeño pepper to the sauce mixture.
What kind of chicken is best for these buns?
I find that shredded chicken breast or thigh works wonderfully. You can cook your chicken by boiling and shredding it, using leftover rotisserie chicken, or even pan-frying and dicing it finely. The key is to have tender, easily incorporated chicken that soaks up the flavors of the dynamite sauce.
Can I prepare the filling ahead of time?
Yes, you can definitely prepare the Cheesy Dynamite Chicken filling a day in advance! Store it in an airtight container in the refrigerator. When you’re ready to assemble and bake, simply spoon the chilled filling into your buns and proceed with the recipe. This makes it even easier to whip up these delicious buns when guests arrive or when you’re craving them.
Cheesy Dynamite Chicken Buns
Spicy and cheesy chicken buns, perfect for a flavorful snack or appetizer. The dough is enriched with milk and honey for a soft texture, while the filling features tender chicken coated in a zesty cheese and spice blend.
Ingredients
-
75 ml water
-
200 ml milk
-
15 g honey
-
9 g instant yeast
-
1 egg
-
30 ml sunflower oil
-
600 g flour
-
8 g salt
-
25 g butter
-
40 g Parmesan cheese
-
2 g cayenne powder
-
1.5 g onion powder
-
1 g black pepper powder
-
700 g chicken filet
-
5 g salt
Instructions
-
Step 1
In a large bowl, combine warm water (around 105-115°F / 40-46°C), milk, honey, and instant yeast. Let stand for 5-10 minutes until foamy. -
Step 2
Add the egg and sunflower oil to the yeast mixture. Whisk to combine. -
Step 3
In a separate bowl, whisk together the flour and salt. Gradually add the dry ingredients to the wet ingredients, mixing until a shaggy dough forms. Turn out onto a lightly floured surface and knead for 8-10 minutes until smooth and elastic. Add the butter in pieces towards the end of kneading until fully incorporated. -
Step 4
Place the dough in a greased bowl, cover, and let rise in a warm place for 1-1.5 hours, or until doubled in size. While the dough rises, dice the chicken filet into small pieces. In a bowl, toss the chicken with 5g salt, Parmesan cheese, cayenne powder, onion powder, and black pepper powder. Cook the seasoned chicken in a skillet over medium-high heat until browned and cooked through. Set aside to cool slightly. -
Step 5
Punch down the risen dough and divide it into 12 equal portions. Flatten each portion into a circle, place a portion of the cooked chicken filling in the center, and then carefully enclose the filling by bringing the edges of the dough together and pinching to seal. Place the buns seam-side down on a baking sheet lined with parchment paper. -
Step 6
Cover the buns and let them rest for 20-30 minutes. Preheat your oven to 375°F (190°C). -
Step 7
Bake for 18-20 minutes, or until golden brown and cooked through. Let cool slightly before serving.
Important Information
Nutrition Facts (Per Serving)
It is important to consider this information as approximate and not to use it as definitive health advice.
Allergy Information
Please check ingredients for potential allergens and consult a health professional if in doubt.