Easy Bunny Cake- Delicious Spring Dessert Idea
Easy Bunny Cake Recipe: Get ready to hop into springtime baking with a treat that’s as delightful to make as it is to devour! This Easy Bunny Cake Recipe is our go-to for creating a show-stopping dessert that will have everyone, from little ones to the young at heart, squealing with joy. We all love a cake that tastes as good as it looks, and this charming bunny creation certainly delivers. What makes this particular Easy Bunny Cake Recipe so special is its incredible simplicity. Forget fussy decorating techniques or hard-to-find ingredients; we’ve streamlined the process to ensure even the most novice baker can achieve stunning results. It’s the perfect centerpiece for Easter brunches, spring parties, or just a fun weekend activity with the family. Prepare for smiles all around with this truly magical and surprisingly easy dessert.
Easy Bunny Cake Recipe
Spring is in the air, and what better way to celebrate than with a delightful and utterly adorable bunny cake? This recipe is designed to be simple and fun, perfect for bakers of all skill levels, even if you’re a complete begin extractner in the kitchen. Imagin extracte the smiles on your loved ones’ faces when they see this sweet creation hopping onto the table! We’re going to transform two simple cake layers into a charming bunny that’s almost too cute to eat. This recipe focuses on ease and visual appeal, so get ready for some happy baking!
Ingredients:
Getting Started: The Foundation of Your Bunny
Before we dive into the decorating magic, let’s ensure our cake layers are ready. If you’re using a cake mix, prepare it according to the package instructions and bake two round cake layers. Allow them to cool completely on a wire rack. This is a crucial step; frosting a warm cake is a recipe for a melty, messy disaster. If you’re baking from scratch, follow your favorite recipe and ensure those layers are thoroughly cooled as well. Once cooled, gently level the tops of your cakes with a serrated knife if they are domed. This will create a flat surface for stacking and decorating.
Bringin extractg Your Bunny to Life: Step-by-Step Assembly
Now for the fun part! We’ll be transforming these humble cake layers into a whimsical bunny.
1. Preparing the Base: Take one of your cooled round cake layers and place it on your serving plate or cake stand. This will be the bunny’s body. Generously spread a layer of white frosting over the entire top surface. This acts as our adhesive and a delicious base for the next step. Now, carefully place the second round cake layer on top of the first, aligning the edges as best as you can. If you’re feeling ambitious and have extra frosting, you can spread a thin layer between the two cake layers as well, though it’s not strictly necessary for this design.
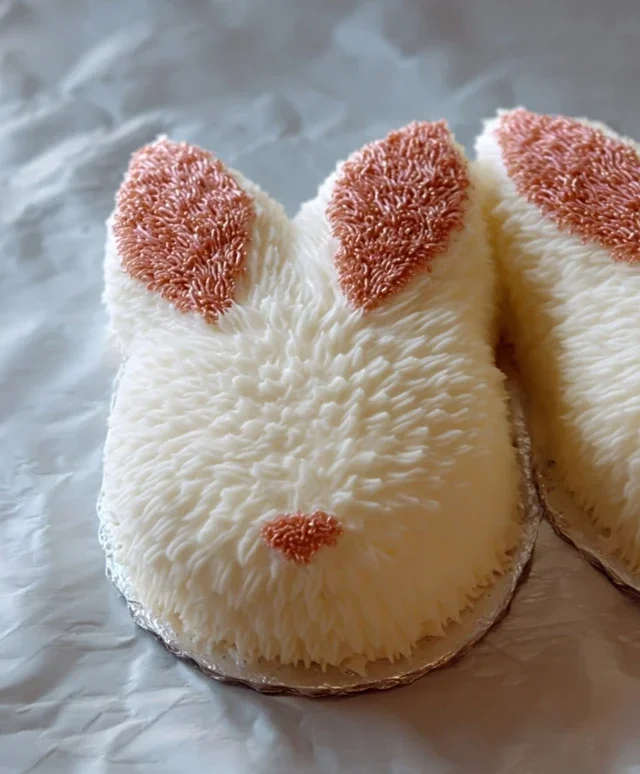
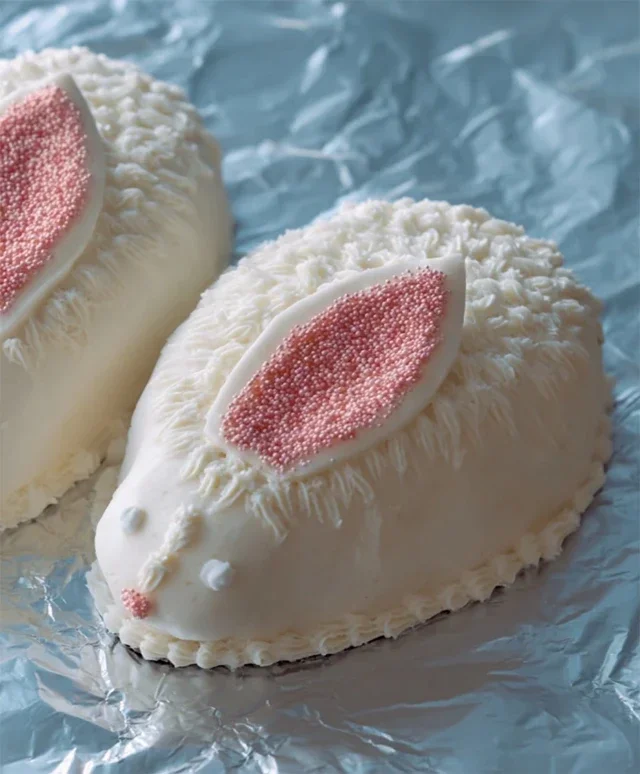
2. Shaping the Head and Ears: This is where our bunny starts to take shape! You’ll need to cut one of the cake layers to create the head and ears. The easiest way to do this is to use a sharp knife. First, cut out a smaller circle from the edge of one of the cake layers – this will be the bunny’s head. Then, cut two elongated oval shapes from the remaining cake. These will be the bunny’s ears. You can place these pieces strategically. A common and very effective method is to place the head slightly overlapping the top edge of the body, and then position the ears upright, leaning slightly outwards on top of the head. You might need to use a little extra frosting as “glue” to help the head and ear pieces stay in place. Don’t worry about perfection here; a slightly askew ear can add to the charm!
3. The First Coat of Fur: Now it’s time for the main frosting application. Using your white frosting, generously cover the entire cake structure – the body, head, and ears. Don’t aim for perfectly smooth frosting at this stage. We want texture! Grab your piping bag fitted with a star tip or a grass tip. Begin extract piping small, upward strokes all over the cake, mimicking bunny fur. Work your way around the entire cake, covering all the visible cake surfaces. This technique creates a lovely fluffy texture and helps hide any imperfections in the cake layers. Take your time and enjoy the process of building up the fur.
4. Adding Bunny Details: The Face and Nose: Once the “fur” is complete, it’s time for the features that make it undeniably a bunny. Take your pink frosting, either pre-made or colored, and place it in a piping bag fitted with a small round tip. Pipe a cute little pink nose in the center of the bunny’s head. For the eyes, use your chocolate icing or melted chocolate in a piping bag with a small round tip. Pipe two oval shapes for the eyes. You can also add small dots of chocolate for pupils within the eyes. For a sweet touch, use your pink frosting again to pipe two small circles on the cheeks, resembling rosy blush, or you can use jellybeans or colorful round candies for this effect.
5. Finishing Touches and Personality: Now, let’s add the final adorable details. Using the chocolate icing or melted chocolate in a piping bag with a small round tip, you can pipe a few whiskers extending from the muzzle area below the nose. You can also add small dots or lines of chocolate on the tips of the ears for a subtle detail. If you’d like, you can also place a few jellybeans or colorful round candies scattered around the base of the cake, like springtime treats. You can even use the remaining pink frosting to add a little highlight dot to the center of the pink nose, making it gleam!
This easy bunny cake is a wonderful centerpiece for any spring gathering, Easter celebration, or just as a fun weekend baking project. The beauty of this recipe is its flexibility. Feel free to adjust the sizes of the ears and head to your liking, and experiment with different candy decorations. The most important ingredient is your enthusiasm, so have fun and enjoy your delicious, handcrafted bunny!
Conclusion:
And there you have it – your very own adorable and incredibly easy bunny cake! This recipe truly shines because it’s designed for bakers of all skill levels. You don’t need to be a pastry chef to create a showstopper that will delight everyone, especially the little ones. It’s the perfect centerpiece for Easter celebrations, spring birthdays, or just a fun weekend baking project. The fluffy cake and simple frosting come together in no time, making it a stress-free way to add a touch of magic to any occasion. I encourage you to give this easy bunny cake recipe a try – you’ll be so proud of your creation!
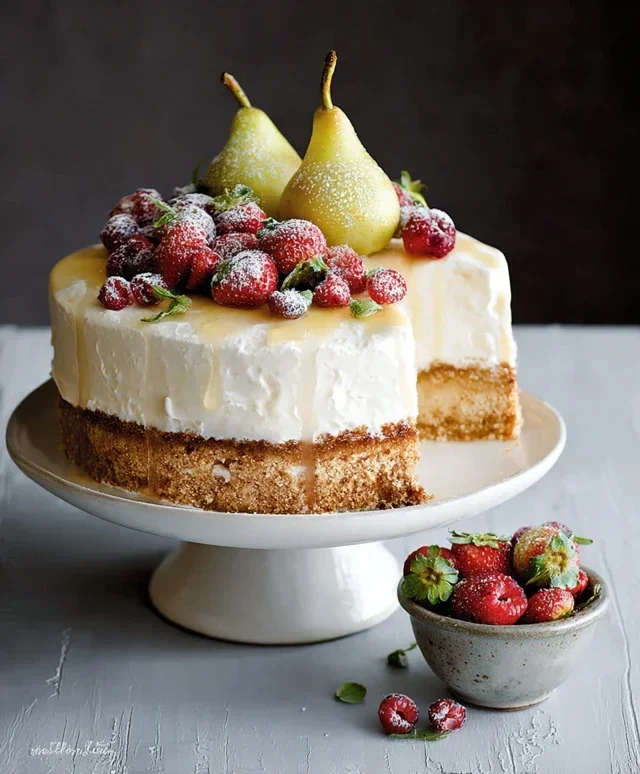
For serving, this cake is fantastic on its own, but you can elevate it with a dollop of whipped cream or a scoop of vanilla ice cream. Consider adding fresh berries like raspberries or blueberries around the base for a burst of color and flavor. If you’re feeling adventurous with variations, try adding a touch of lemon zest to the cake batter for a bright, citrusy twist, or use different colors of frosting to create multiple bunnies. You could even use mini marshmallows for fluffy bunny tails or chocolate chips for the eyes and nose!
Frequently Asked Questions:
Q: Can I make this bunny cake ahead of time?
A: Absolutely! You can bake the cake layers a day in advance and store them tightly wrapped at room temperature. Frosting the cake a few hours before serving is ideal to prevent the frosting from getting too soft, especially in warmer weather.
Q: What kind of cake pan should I use for the bunny shape?
A: While this recipe assumes a simple assembly of round cakes, you can also purchase a dedicated bunny-shaped cake pan if you want an even easier sculpting process. Alternatively, you can use two 8-inch round cake pans and cut them into shape.
Q: My frosting is too runny, what can I do?
A: If your frosting is too thin, try adding a tablespoon or two more of powdered sugar at a time until it reaches your desired consistency. For a thicker frosting, you can also pop it in the refrigerator for about 15 minutes to firm up.
Easy Bunny Cake Recipe
A simple and fun bunny-shaped cake perfect for Easter or any springtime celebration, made with readily available ingredients.
Ingredients
-
Two round cake layers (use one cake mix or your favorite homemade recipe)
-
White frosting (ready-made or your favorite homemade recipe)
-
Pink frosting (or use pink gel food coloring on white frosting)
-
Chocolate icing or melted chocolate for details
-
Jellybeans or colorful round candies
-
Piping bags
Instructions
-
Step 1
Prepare and bake your two round cake layers according to your chosen cake mix or homemade recipe. Let them cool completely. -
Step 2
Place one cake layer on your serving plate. Frost the top with white frosting. -
Step 3
Place the second cake layer on top of the first. Trim a small portion from the top of the second layer to create a flatter surface for the face, if desired. -
Step 4
Frost the entire cake with white frosting, smoothing it as much as possible to create the bunny’s body. -
Step 5
Using pink frosting and piping bags, create the bunny’s ears, nose, and inner ear details. Use chocolate icing or melted chocolate to pipe eyes and whiskers. -
Step 6
Decorate the cake with jellybeans or colorful round candies around the base or as additional embellishments.
Important Information
Nutrition Facts (Per Serving)
It is important to consider this information as approximate and not to use it as definitive health advice.
Allergy Information
Please check ingredients for potential allergens and consult a health professional if in doubt.