BBQ Chicken Grilled Cheese – Ultimate Comfort Food
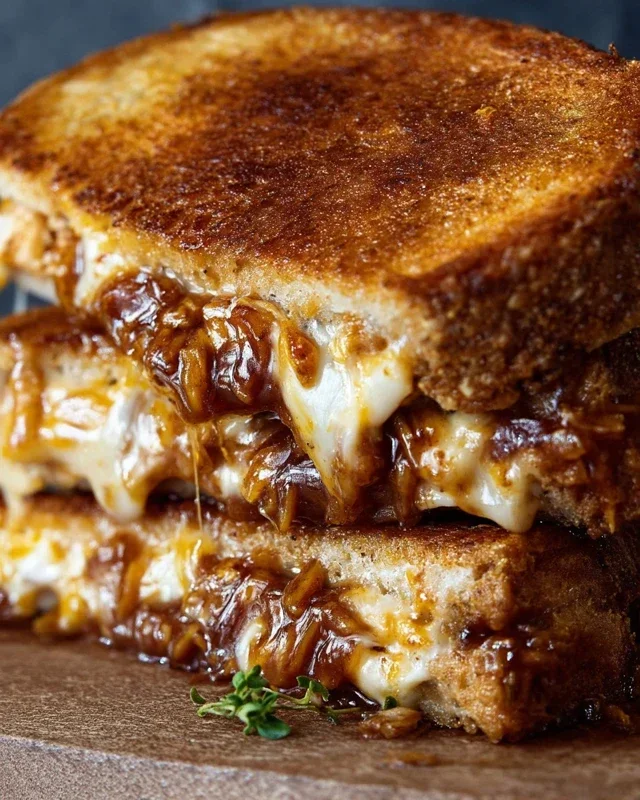
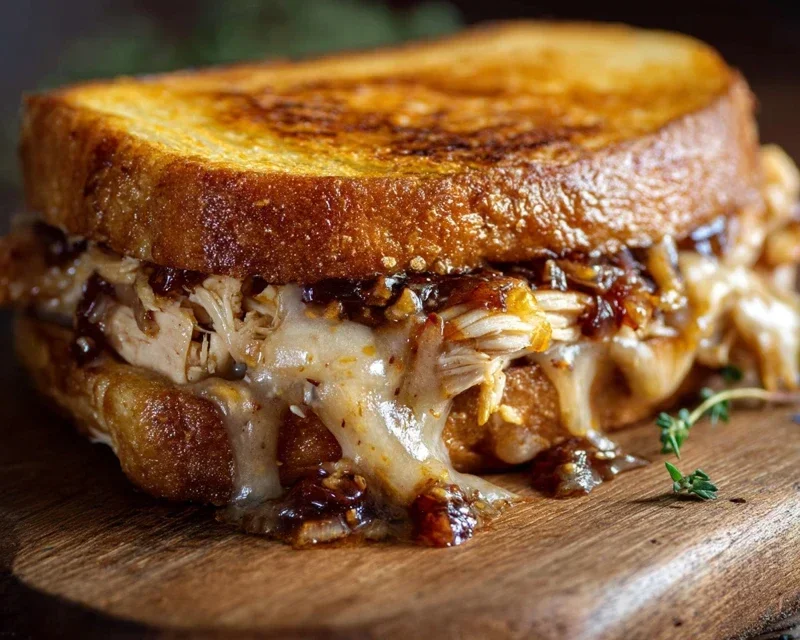
BBQ Chicken Grilled Cheese Sandwich – this isn’t just a sandwich; it’s a culinary hug, a symphony of smoky, tangy, and cheesy goodness all melded between two perfectly toasted slices of bread. Forget your childhood grilled cheese; we’re taking it to a whole new level. This is the ultimate comfort food, elevated. Why do we all crave this delightful creation? It’s the irresistible combination of tender, shredded chicken coated in a rich BBQ sauce, perfectly complemented by gooey, melted cheese, all embraced by buttery, crispy bread. What truly makes this BBQ Chicken Grilled Cheese Sandwich special is the harmonious blend of sweet, savory, and smoky flavors that dance on your palate with every bite. It’s a guaranteed crowd-pleaser, a quick weeknight dinner hero, or a weekend indulgence that never disappoints.
Get Ready for Your New Favorite Meal!
Let’s Craft the Ultimate BBQ Chicken Grilled Cheese Sandwich
The Ultimate BBQ Chicken Grilled Cheese Sandwich
Get ready for a flavor explosion that’s going to redefine your grilled cheese game. Forget your basic cheddar on white; we’re diving into a smoky, tangy, cheesy masterpiece that’s equal parts comfort food and culinary delight. This BBQ Chicken Grilled Cheese Sandwich is packed with tender shredded chicken tossed in a rich BBQ sauce, layered with melty Havarti, and grilled to golden perfection between slices of hearty sourdough. It’s the perfect weeknight dinner, a fantastic lunch option, or even a seriously satisfying snack. Let’s get cooking!
Ingredients:
Let’s Get the Filling Ready
The heart of this sandwich is the succulent BBQ chicken filling. We’ll start by building a little flavor base to make our chicken truly sing. In a medium skillet, heat the 2 tablespoons of olive oil over medium heat. Once shimmering, add your thinly sliced red onion. We want to cook these onions until they’re nice and softened, about 5-7 minutes, stirring occasionally. They should become translucent and a little sweet. Now, add the minced garlic to the skillet. Be careful not to burn the garlic; stir it around for about 30 seconds until fragrant.
Next, it’s time to introduce the star: the shredded roasted chicken. Add the 2 ½ cups of shredded chicken to the skillet with the onions and garlic. Give it a good stir to combine. Sprinkle in the ½ teaspoon of paprika and the 1 teaspoon of Worcestershire sauce. These additions will deepen the savory notes and add a touch of complexity. Stir everything together well.
Now for the magic sauce! Pour in the 1 cup of BBQ sauce. Stir until every piece of chicken is coated in that delicious, smoky goodness. Let this mixture simmer for about 5 minutes, allowing the flavors to meld and the sauce to thicken slightly. We’re looking for a luscious, sticky coating on the chicken. Taste it and adjust seasoning if you like – maybe a pinch of salt or pepper, or even a dash more of your favorite hot sauce if you’re feeling adventurous. Once it’s perfect, remove the skillet from the heat and set aside. This filling can be made ahead of time, which is a great tip for busy days!
Preparing for the Grill
While our chicken filling rests, let’s get the bread and butter ready. In a small bowl, combine the softened ¼ cup of butter, the 2 minced garlic cloves, and the 2 teaspoons of minced parsley. This is going to be our garlic herb butter, which will give the outside of our grilled cheese that irresistible crispy, golden, and flavorful crust. Mash it all together with a fork until it’s well combined and looks like a lovely herby paste.
Now, we need to assemble our sandwiches. Lay out 6 slices of your chosen bread. On each of these slices, layer 2 slices of the Havarti cheese. Havarti is fantastic here because it melts beautifully and has a mild, creamy flavor that complements the BBQ chicken without overpowering it. On top of the cheese, spoon a generous portion of the BBQ chicken mixture. Don’t be shy – load it up! Then, top the chicken with another 1 slice of Havarti cheese. Finally, place the remaining 6 slices of bread on top to complete the sandwiches.
Grilling to Perfection
This is where the magic truly happens. You have two main options for grilling: a skillet or a griddle. A large skillet or a non-stick griddle works best. Heat your skillet or griddle over medium-low heat. This lower heat is crucial for grilled cheese. We want the bread to get golden brown and crispy, and the cheese to melt completely, without burning the bread before the inside is heated through.
Generously spread the garlic herb butter mixture evenly over the top side of each assembled sandwich. Carefully place the sandwiches, butter-side down, onto the preheated skillet or griddle.
Now, spread the garlic herb butter mixture on the side of the bread that is facing up. Let the sandwiches cook for about 5-7 minutes per side. You’re looking for that perfect golden-brown crust and beautifully melted cheese oozing out the sides. Resist the urge to press down too hard on the sandwiches with your spatula, as this can push out the delicious filling. Instead, let the heat do the work. Gently lift an edge to check for browning.
Once the first side is beautifully golden and the cheese is starting to look melty, it’s time to flip. Carefully slide your spatula underneath and flip the sandwiches. Cook the second side for another 5-7 minutes, or until it’s also golden brown and the cheese is completely melted and gooey. You might need to adjust the heat slightly if one side is cooking faster than the other. If your cheese isn’t fully melted by the time the bread is perfectly toasted, you can cover the skillet loosely with a lid for a minute or two to help trap the heat and melt the cheese.
Serving Your Masterpiece
Once both sides are perfectly grilled, remove the sandwiches from the skillet. For the best experience, let them rest for just a minute or two before slicing. This allows the cheese to set slightly, making them easier to cut and preventing the filling from all escaping. Slice each sandwich in half, either diagonally or straight down, and admire your handiwork. The layers of gooey cheese, smoky chicken, and crispy, garlicky bread are a sight to behold. Serve immediately with your favorite side, like coleslaw, a simple green salad, or some crispy tater tots. Enjoy every delicious, messy, wonderful bite!
Conclusion:
There you have it – a recipe for the ultimate BBQ Chicken Grilled Cheese Sandwich! This isn’t just any grilled cheese; it’s a flavor explosion that perfectly marries the smoky sweetness of BBQ chicken with the comforting gooeyness of melted cheese, all encased in golden-brown, crispy bread. It’s incredibly simple to make, making it an ideal weeknight meal or a weekend indulgence. The balance of textures and tastes is truly remarkable, and I’m confident you’ll find yourself craving this delicious creation again and again. It’s a fantastic way to elevate a classic comfort food into something truly special.
For serving, I love pairing this BBQ Chicken Grilled Cheese Sandwich with a crisp, refreshing coleslaw or a side of sweet potato fries. A simple green salad with a light vinaigrette also cuts through the richness beautifully. Don’t be afraid to experiment with variations! You can swap out the BBQ sauce for your favorite flavor, add a sprinkle of red pepper flakes for a little heat, or even throw in some caramelized onions or pickled jalapeños for an extra layer of complexity. So, gather your ingredients, fire up that grill (or skillet!), and give this fantastic recipe a try. I promise you won’t be disappointed!
Frequently Asked Questions:
Can I use store-bought rotisserie chicken for this recipe?
Absolutely! Using a pre-cooked rotisserie chicken is a fantastic shortcut to make this BBQ Chicken Grilled Cheese Sandwich even quicker and easier. Just shred the chicken and toss it with your favorite BBQ sauce.
What kind of cheese works best?
While cheddar is a classic choice, I highly recommend using a blend! Monterey Jack, pepper jack for a little kick, or even some smoked gouda can add incredible depth of flavor and melt beautifully. The key is a cheese that melts well and complements the BBQ chicken.
BBQ Chicken Grilled Cheese Sandwich
A delicious and easy grilled cheese sandwich packed with flavorful BBQ chicken and melted Havarti cheese on toasted sourdough bread.
Ingredients
-
2 tablespoons olive oil
-
1 small red onion, thinly sliced
-
3 cloves garlic, minced
-
2 ½ cups shredded roasted chicken
-
½ teaspoon paprika
-
1 teaspoon Worcestershire sauce
-
1 cup BBQ sauce
-
12 slices Havarti cheese
-
¼ cup butter
-
2 cloves garlic, minced
-
2 teaspoons parsley, minced
-
12 slices sourdough bread or sturdy white bread
Instructions
-
Step 1
Heat olive oil in a large skillet over medium heat. Add thinly sliced red onion and cook until softened, about 5-7 minutes. Add minced garlic and cook for 1 minute more until fragrant. -
Step 2
Stir in the shredded roasted chicken, paprika, and Worcestershire sauce into the skillet with the onions and garlic. Cook for 2-3 minutes until the chicken is heated through. -
Step 3
Pour in the BBQ sauce and stir to combine with the chicken mixture. Simmer for 5-7 minutes, allowing the sauce to thicken slightly and coat the chicken. -
Step 4
While the chicken mixture simmers, spread butter on one side of each slice of bread. In a separate small bowl, combine minced garlic and minced parsley with the melted butter (if not already melted from spreading). -
Step 5
Assemble the sandwiches: place 6 slices of bread, butter-side down, on a clean surface. Layer 2 slices of Havarti cheese on each piece of bread. Spoon a generous portion of the BBQ chicken mixture over the cheese. Top with another 2 slices of Havarti cheese and then the remaining bread slices, butter-side up. -
Step 6
Heat a large griddle or skillet over medium heat. Grill the sandwiches for 3-5 minutes per side, or until the bread is golden brown and toasted, and the cheese is melted and gooey.
Important Information
Nutrition Facts (Per Serving)
It is important to consider this information as approximate and not to use it as definitive health advice.
Allergy Information
Please check ingredients for potential allergens and consult a health professional if in doubt.