Easy Peach Hand Pies – Delicious Sweet Treat
Peach hand pies are the quintessential taste of summer, wrapped in a flaky, golden embrace that’s as delightful to hold as it is to devour. There’s something undeniably charming about a perfectly portioned pastry pocket, bursting with the sweet, juicy goodness of sun-ripened peaches. We adore them because they’re portable perfection, ideal for picnics, road trips, or just a sweet treat enjoyed in your favorite sunny spot. What truly makes these peach hand pies so special is the magical combination of tender, spiced fruit and that impossibly buttery crust that shatters with every bite. It’s a simple pleasure, elevated by the quality of its ingredients and the love that goes into making them. Get ready to fall head over heels for these delightful peach hand pies!
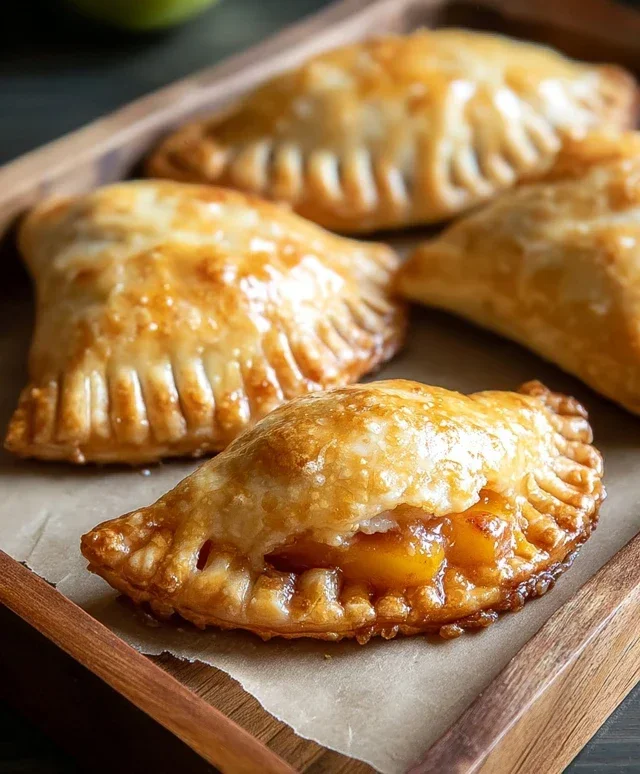
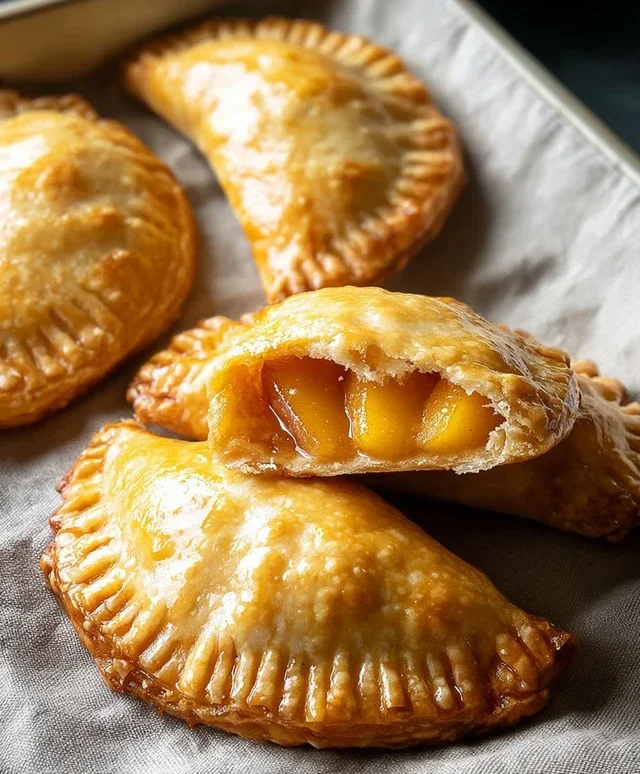
Peach Hand Pies
There’s something undeniably charming about a hand pie. These little pockets of deliciousness are perfect for on-the-go treats, delightful desserts, or even a sweet breakfast. And when it comes to fillings, few fruits evoke the warmth and sweetness of summer quite like peaches. These peach hand pies are incredibly easy to make, thanks to a little help from a store-bought shortcut, making them an ideal recipe for bakers of all skill levels. Imagin extracte biting into a warm, flaky crust encasing a burst of sweet, spiced peach filling – it’s pure bliss!
We’re going to keep this recipe straightforward and wonderfully satisfying. The key here is the pre-made peach pie filling, which saves a significant amount of time and effort while still delivering that classic, comforting peach flavor. Paired with readily available refrigerated pie crust, these hand pies come together surprisingly quickly, allowing you more time to enjoy them!
Ingredients:
Cooking Instructions
Get ready to create some magic in your kitchen! These steps will guide you through making your delicious peach hand pies from start to finish.
1. Preparing the Peach Filling and Crusts: First things first, let’s get our peach filling ready. Open the 21 oz. can of peach pie filling and pour it into a medium-sized bowl. Give it a gentle stir with a spoon to make sure the peaches and the syrupy filling are well combined. If the peach chunks are particularly large, you can gently break them up a bit with your spoon, but be careful not to mash them into a paste. We want some nice, recognizable pieces of peach for texture. Now, let’s turn our attention to the pie crusts. Carefully unroll the two refrigerated pie crusts onto a clean, lightly floured surface. Using a round cookie cutter, biscuit cutter, or even the rim of a glass, cut out circles from each crust. A 4-inch diameter is a good size, but you can adjust this based on your preference. You should aim to get about 6-8 circles from each crust, depending on your cutter size. Place the cut-out circles on a baking sheet lined with parchment paper.
2. Assembling the Hand Pies: Now for the fun part – filling our little pie pockets! Take one of your pie crust circles and spoon about 2-3 tablespoons of the prepared peach pie filling onto one half of the circle, leaving a 1/2-inch border around the edge. Be generous, but don’t overfill, or it will be difficult to seal the edges properly. You want enough filling to be satisfying but not so much that it oozes out excessively during frying. Once filled, take another pie crust circle and gently place it on top of the filled circle, aligning the edges. Press down firmly around the filling to seal the edges. You can use the tines of a fork to crimp the edges and ensure a good seal, which also creates a pretty decorative edge. Repeat this process with the remaining pie crust circles and peach filling until you have assembled all your hand pies.
3. Preparing for Frying: Before we get to the delicious frying stage, we need to prepare our hand pies. To prevent the steam from building up inside the pies and causing them to puff up unevenly or burst, it’s essential to create some vents. Using a sharp knife or the tip of a paring knife, carefully cut a small slit or two in the top crust of each hand pie. These little vents will allow steam to escape as the pies cook, ensuring a perfectly puffed and evenly cooked pastry. You can also use a toothpick for very small vents if you prefer. Ensure your sealing is still secure after venting.
4. Frying the Hand Pies: This is where the magic really happens and those golden-brown, crispy crusts are born! Pour vegetable oil into a heavy-bottomed pot or Dutch oven to a depth of about 2-3 inches. Heat the oil over medium-high heat until it reaches approximately 350°F (175°C). A candy thermometer or a deep-fry thermometer is very helpful here to maintain the correct temperature. Carefully slide 2-3 hand pies into the hot oil at a time, being careful not to overcrowd the pot. Overcrowding will lower the oil temperature, leading to greasy pies. Fry the hand pies for about 3-5 minutes per side, or until they are a beautiful golden brown and the crust is puffed and cooked through. Use a slotted spoon or a spider strainer to gently flip the pies halfway through frying.
5. Draining and Glazing: Once your peach hand pies are perfectly golden brown on both sides, carefully remove them from the hot oil using your slotted spoon or spider strainer. Transfer them to a wire rack set over a baking sheet lined with paper towels. This step is crucial for allowing the excess oil to drain off, ensuring your hand pies are delightfully crispy, not greasy. Let them drain for a few minutes. While the pies are still warm, it’s time to make our simple glaze. In a small bowl, whisk together the 1/2 cup powdered sugar, 1 teaspoon corn syrup, and 1 tablespoon water. The corn syrup adds a lovely sheen and helps the glaze set slightly. Drizzle this glaze generously over the warm hand pies. The warmth will help the glaze melt and spread beautifully. You can use a spoon or a piping bag for a more controlled application. Let the glaze set for a few minutes before serving. Enjoy these delightful treats warm for the best experience!
Conclusion:
I hope you’re as excited to whip up these delicious peach hand pies as I am to have shared them with you! They truly are a triumph of simple ingredients and comforting flavors. The perfect balance of flaky, buttery crust and sweet, slightly tart, perfectly spiced peach filling makes these hand pies an absolute winner for any occasion. Whether you’re a seasoned baker or just starting out, this recipe is surprisingly forgiving and incredibly rewarding. The aroma that fills your kitchen as they bake is simply divine, and the taste? Pure bliss!
These versatile treats are fantastic served warm, perhaps with a dollop of vanilla ice cream or a drizzle of caramel sauce. They also make for a wonderful portable snack for picnics, potlucks, or even a delightful breakfast on the go. Don’t be afraid to experiment with variations! You could easily swap the peaches for other stone fruits like apricots or plums, or even add a sprinkle of cinnamon or nutmeg to the filling for an extra kick of warmth.
I wholeheartedly encourage you to give these peach hand pies a try. They are guaranteed to become a cherished recipe in your repertoire. So grab some fresh peaches, get your apron on, and let’s bake some happiness!
Frequently Asked Questions:
Q: Can I make the dough ahead of time?
A: Absolutely! You can prepare the pie dough up to 2 days in advance and store it, tightly wrapped in plastic wrap, in the refrigerator. Just let it sit at room temperature for about 15-20 minutes before rolling it out to make it more pliable.
Q: What if my peaches aren’t very sweet?
A: No problem at all! If your peaches are a bit tart, you can simply adjust the amount of sugar in the filling to your preference. Tasting the filling before adding it to the crust is always a good idea to get it just right.
Q: How should I store leftover peach hand pies?
A: Store any leftover hand pies in an airtight container at room temperature for up to 2 days, or in the refrigerator for up to 4 days. They are delicious cold, but I highly recommend warming them up slightly in a toaster oven or conventional oven for a few minutes to revive that wonderful flaky crust!
Peach Hand Pies
Delicious and easy-to-make peach hand pies, perfect for a sweet treat.
Ingredients
-
21 oz. can peach pie filling
-
Refrigerated pie crust
-
1/2 cup powdered sugar
-
1 teaspoon corn syrup
-
1 tablespoon water
-
Vegetable oil for frying
Instructions
-
Step 1
Prepare the pie crust according to package directions. Cut out circles using a biscuit cutter or glass. -
Step 2
Spoon peach pie filling onto one half of each circle, leaving a border. -
Step 3
Fold the other half of the crust over the filling and crimp the edges with a fork to seal. -
Step 4
Heat vegetable oil in a skillet over medium heat. Carefully place hand pies into the hot oil, a few at a time. -
Step 5
Fry for 2-3 minutes per side, until golden brown and puffed. -
Step 6
Remove from oil and place on a wire rack to drain. While warm, prepare the glaze. -
Step 7
Whisk together powdered sugar, corn syrup, and water until smooth. Drizzle over warm hand pies.
Important Information
Nutrition Facts (Per Serving)
It is important to consider this information as approximate and not to use it as definitive health advice.
Allergy Information
Please check ingredients for potential allergens and consult a health professional if in doubt.