Easy Pickled Red Onions- Quick & Tangy Recipe
Pickled red onions are an absolute revelation, a vibrant punch of flavor and color that can transform everyday meals into something truly spectacular. I’m constantly asked about them, and it’s no wonder why! These aren’t just any pickled onions; they possess a magical ability to add a delightful tang and subtle sweetness that cuts through richness, brightens up salads, and adds a gorgeous visual pop to tacos, sandwiches, and even avocado toast. What makes these pickled red onions so special is their incredible versatility and how effortlessly they elevate a dish. They offer a beautiful balance – not too sharp, not too sweet, just perfectly zingy. Forget those store-bought versions that often taste overly vinegary. Making your own pickled red onions is surprisingly simple and incredibly rewarding, giving you complete control over the flavor profile. Get ready to impress yourself and everyone you cook for with this game-changin extractg condiment!
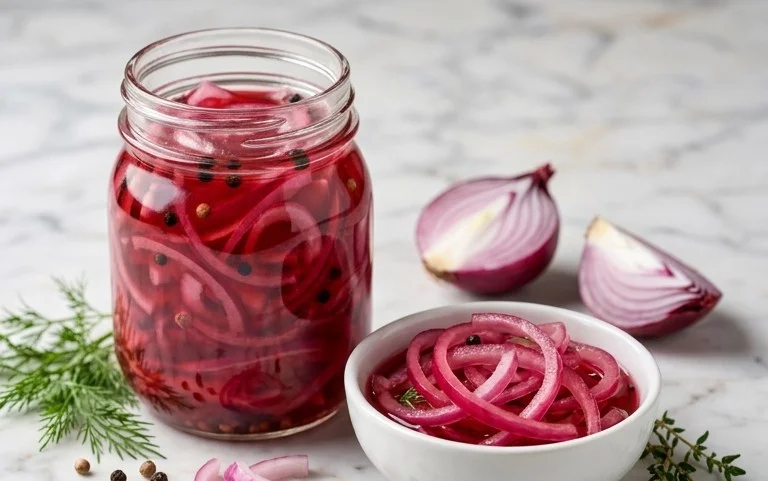
Pickled Red Onions
There are few pantry staples that can instantly elevate a dish quite like pickled red onions. These vibrant, jewel-toned beauties add a delightful tang, a touch of sweetness, and a satisfying crunch to everything from tacos and salads to sandwiches and burgers. And the best part? They are incredibly simple to make at home, requiring just a few basic ingredients and minimal effort. Forget those store-bought versions that often taste overly vinegary or artificial; making your own pickled red onions is a game-changer. The process is almost magical, transforming humble red onions into something truly special. I love having a jar of these in my fridge, always ready to add a burst of flavor and color to any meal. They are perfect for adding a sophisticated touch to even the simplest weeknight dinner.
Ingredients:
Instructions:
Step 1: Prepare the Onions
The first step is to get your red onions ready. You’ll want to peel them, which is usually quite straightforward. Once peeled, slice the onions as thinly as possible. A mandoline slicer is your best friend here for achieving uniform, paper-thin slices. This is crucial because thinner slices will pickle more evenly and quickly, and they’ll have a more pleasant texture. If you don’t have a mandoline, a sharp knife and a steady hand will work, but aim for consistency. I like to slice them crosswise, creating beautiful rings. After slicing, I like to place them in a bowl and rinse them under cold water for a minute or two. This helps to remove some of the stronger, sharper onion bite, leaving you with a more mellow flavor in your pickled onions. Drain them thoroughly afterward.
Step 2: Create the Pickling Brine
Now, let’s make the magic happen with the brine. In a medium saucepan, combine the water, white vinegar, sugar, and sea salt. If you’re feeling adventurous and like a little kick, this is also the time to add your red pepper flakes. The amount of sugar can be adjusted to your preference. I’ve found that 3 tablespoons strikes a nice balance between sweet and tart, but if you prefer a sweeter pickle, feel free to add a little more. Conversely, if you like it tarter, you can slightly reduce the sugar. White vinegar is the classic choice for its clean, sharp flavor, but you could experiment with apple cider vinegar for a slightly fruitier note, though white vinegar is generally recommended for its neutral profile. Stir everything together until the sugar and salt are completely dissolved.
Step 3: Heat the Brine
Place the saucepan over medium heat and bring the mixture to a simmer. You don’t need to boil it vigorously; just let it reach a gentle simmer and continue to stir occasionally to ensure all the sugar and salt have dissolved. Heating the brine helps to infuse the flavors and also makes the onions more receptive to the pickling process. Once it’s simmering and everything is dissolved, remove the saucepan from the heat.
Step 4: Combine Onions and Brine
Now it’s time to bring the onions and brine together. Take your sliced red onions, which you’ve already drained, and place them into a clean, heatproof jar or container. I prefer using glass jars with airtight lids, as they are easy to store and look lovely. Make sure the jar is large enough to hold all the onions and the brine comfortably. Carefully pour the hot pickling brine over the sliced onions in the jar. Ensure that the onions are completely submerged in the liquid. If some slices are floating, gently press them down with a spoon or fork to make sure they are fully covered. This even coverage is essential for consistent pickling.
Step 5: Chill and Pickle
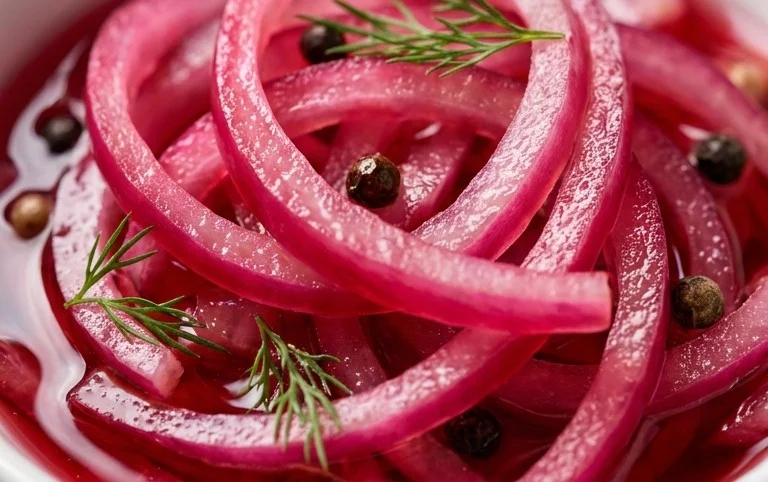
Once the onions are submerged, let the jar sit at room temperature for about 30 minutes to an hour. This initial resting period allows the hot brine to begin extract its work of softening and flavoring the onions. After this initial cooling period, secure the lid on the jar and transfer it to the refrigerator. This is where the real pickling magic happens. You can start enjoying your pickled red onions within a few hours, but they will develop a deeper, more nuanced flavor if you let them pickle for at least 24 hours. The longer they sit in the brine, the more tender and flavorful they will become. They will turn a beautiful, vibrant pink hue as they pickle.
Storage and Enjoyment
These pickled red onions will keep in the refrigerator for at least 2-3 weeks, though they often last longer. The flavor will continue to develop over time. They are incredibly versatile. Add them to your avocado toast, pile them on your favorite sandwich or burger, scatter them over a salad for a bright pop, or serve them as a stunning accompaniment to grilled meats or fish. They are also a fantastic addition to any charcuterie board. Don’t discard the brine! It’s packed with delicious flavor and can be used in salad dressings or marinades. Enjoy the wonderful versatility and bright flavor of your homemade pickled red onions!
Conclusion:
And there you have it! Creating your own batch of these vibrant, zesty pickled red onions is incredibly simple, and the rewards are immense. This recipe is truly a game-changer because it transforms a humble ingredient into a flavor powerhouse that elevates countless dishes. The beautiful rosy hue is instantly appetizing, and the satisfying crunch and tangy bite are addictive. Don’t be afraid to experiment – the versatility of pickled red onions is one of their greatest strengths. I truly encourage you to give this recipe a try. You’ll find yourself reaching for them again and again, adding that perfect pop of flavor to everything from tacos and salads to sandwiches and charcuterie boards. They are also fantastic stirred into dips or served alongside grilled meats and seafood.
Frequently Asked Questions:
How long do pickled red onions last?
When stored in an airtight container in the refrigerator, your pickled red onions should stay fresh and delicious for at least 2-3 weeks. The acidity helps preserve them, but they are best enjoyed within this timeframe for optimal flavor and texture.
Can I adjust the sweetness or acidity?
Absolutely! The beauty of making your own is customization. For a sweeter pickle, increase the sugar slightly. For a more acidic punch, add a little extra vinegar. Experiment with different vinegars too, like apple cider or white grape juice vinegar, for subtle flavor variations.
What can I do with the pickling liquid?
Don’t discard that flavorful liquid! It’s packed with deliciousness. You can use it as a vinaigrette base for salads, add a splash to marinades for meats or tofu, or even use it to brine chicken before frying for an extra layer of flavor.
Pickled Red Onions
Quick and easy pickled red onions, perfect for adding a tangy, slightly sweet, and vibrant kick to sandwiches, tacos, salads, and more. A versatile condiment that elevates any dish.
Ingredients
-
2 medium red onions ((or 3 small ones))
-
1 1/4 cup water
-
1 1/4 cup white vinegar
-
3 tbsp sugar
-
1 tbsp sea salt
-
1/4-1/2 tsp red pepper flakes ((optional))
Instructions
-
Step 1
Thinly slice the red onions. A mandoline is helpful for even slices, or use a sharp knife. -
Step 2
In a medium saucepan, combine the water, white vinegar, sugar, and sea salt. Stir until the sugar and salt are dissolved. -
Step 3
Bring the mixture to a gentle simmer over medium heat, just until the sugar and salt are fully dissolved. Do not boil vigorously. -
Step 4
Place the sliced red onions into a heatproof jar or bowl. If using, add the red pepper flakes. -
Step 5
Pour the hot brine over the sliced onions, ensuring they are fully submerged. The onions will begin to change color immediately. -
Step 6
Let the mixture cool to room temperature, then cover and refrigerate. The onions are best after at least 30 minutes but can be stored for several weeks.
Important Information
Nutrition Facts (Per Serving)
It is important to consider this information as approximate and not to use it as definitive health advice.
Allergy Information
Please check ingredients for potential allergens and consult a health professional if in doubt.