Easy Mini Cannoli Cups- Delicious Italian Treats
Mini Cannoli Cups are about to become your new favorite sweet treat, and for good reason! Who can resist that irresistible combination of crispy, golden pastry shells and lusciously creamy, sweet ricotta filling? I know I can’t! These delightful little parcels of joy capture all the authentic Italian charm of their larger cousins, but with a perfect, bite-sized presentation. What makes these Mini Cannoli Cups truly special is their versatility. They’re ideal for parties, a sophisticated dessert after a family meal, or even just a delightful afternoon indulgence. Forget the fuss of rolling and frying large shells; our recipe simplifies the process, making it achievable for any home baker. Get ready to impress your friends and family with these adorable and utterly delicious Mini Cannoli Cups!
Mini Cannoli Cups
Are you craving the delightful crunch of a cannoli shell paired with that creamy, sweet ricotta filling, but find the idea of rolling and frying traditional cannoli intimidating? I totally get it! That’s where these Mini Cannoli Cups come in. They’re a fantastic shortcut to cannoli bliss, using readily available ingredients and a much simpler method. These bite-sized wonders are perfect for parties, dessert tables, or just a special treat to enjoy yourself. The crisp, slightly sweet pastry cups are incredibly easy to make, and the luscious ricotta filling is a dream. Let’s dive into how we can whip up these delicious treats in no time!
Ingredients:
Getting Started: The Ricotta Filling
The heart of any good cannoli is its filling, and ours is no exception! To begin extract, you’ll want to ensure your ricotta is well-drained. This is a crucial step to prevent a watery filling. You can do this by lining a fine-mesh sieve with cheesecloth or a clean paper towel and letting the ricotta sit in it for at least 30 minutes, or even longer in the refrigerator. Once drained, transfer the ricotta to a medium bowl. Add the powdered sugar and granulated sugar. Mix these together thoroughly until the sugars are completely incorporated and the mixture is smooth. Next, stir in the finely grated orange or lemon zest. I love the bright, citrusy pop it gives the filling – it really cuts through the richness. Finally, add the vanilla extract and give everything one last good stir. Taste your filling and adjust sweetness if needed. Cover the bowl and pop it in the refrigerator while you prepare the pastry cups. Keeping it chilled will help it firm up a bit more, making it easier to fill.
Crafting the Crispy Cups
Now for the fun part: creating our edible cups! Carefully unfold the softened refrigerated pie crusts onto a lightly floured surface. It’s important to follow the package directions for softening the crusts to ensure they are pliable and won’t crack. Use a round cookie cutter or a glass to cut out circles from the pie crusts. You’ll want these circles to be slightly larger than the openings of your muffin tin cups. If you don’t have cookie cutters, you can also use a knife to score circles. Gently press each dough circle into the cups of a standard muffin tin, forming a neat little cup shape. Don’t worry if they aren’t perfectly formed; a little rustic charm is part of their appeal!
Baking to Golden Perfection
Preheat your oven to 375°F (190°C). In a small bowl, combine the turbinado sugar and ground cinnamon. This spiced sugar mixture is going to give our pastry cups that irresistible golden crust and a hint of warmth. Sprinkle a generous amount of this cinnamon-sugar mixture into each pie crust cup. This not only adds flavor but also helps create a beautiful, crunchy topping. Place the muffin tin into the preheated oven. Bake for 12 to 15 minutes, or until the pastry is golden brown and puffed. Keep a close eye on them as oven times can vary. You want them cooked through and nicely browned, but not burnt. Once they’re done, carefully remove the muffin tin from the oven. Allow the cups to cool in the muffin tin for a few minutes before gently transferring them to a wire rack to cool completely. It’s essential that they are completely cool before filling, otherwise, the filling will melt and become messy.
Assembling Your Mini Cannoli Masterpieces
Once your pastry cups are completely cool, it’s time for the grand finnon-alcoholic ale! Spoon or pipe the chilled ricotta filling into each of the baked cups. You can use a spoon for a more rustic look, or a piping bag with a wide tip for a more polished presentation. Fill them generously, but don’t overstuff them to the point where the filling spills out. This is also where you can add your decorative flair! Sprinkle the tops with the miniature semisweet chocolate chips or finely chopped pistachios. These add a lovely texture and visual appeal. For that classic cannoli finish, dust the tops with a little extra powdered sugar. It’s like a final touch of snow!
Enjoy these delightful Mini Cannoli Cups immediately for the best crunch and flavor experience. They are best enjoyed the day they are made, as the pastry can soften over time. However, if you have leftovers, you can store them in an airtight container at room temperature for a day or two, though the texture might change slightly. These are truly a joy to make and even more of a joy to eat!
Conclusion:
I hope you’re as excited to try these Mini Cannoli Cups as I am to share them! These little delights are a fantastic way to enjoy the classic taste of cannoli without the fuss of rolling and frying shells. They’re incredibly versatile, perfect for parties, a sweet afternoon treat, or even a special dessert when you want something impressive but manageable. The crisp, baked shells provide the perfect counterpoint to the creamy, sweet ricotta filling, and the customizable toppings allow you to tailor them to any occasion or preference. Whether you’re a seasoned baker or just starting out, these Mini Cannoli Cups are surprisingly simple to whip up and are guaranteed to be a crowd-pleaser.
For serving, I love arrangin extractg them on a festive platter. They look stunning sprinkled with a little extra powdered sugar or adorned with fresh berries. Think of them as individual edible masterpieces! For variations, don’t be afraid to experiment. You could fold in mini chocolate chips, a hint of espresso powder, or even some finely chopped pistachios into the filling itself. For the topping, beyond the classic chocolate chips and pistachios, consider adding colorful sprinkles for a fun touch, or even a drizzle of caramel sauce.
Give these Mini Cannoli Cups a try – I promise you won’t regret it! They are a truly delightful way to bring a taste of Sicily into your home.
Frequently Asked Questions:
Can I make the shells ahead of time?
Absolutely! The baked shells can be made a day or two in advance and stored in an airtight container at room temperature. This makes assembly on the day of serving even quicker!
What if I don’t have mini muffin tins?
While mini muffin tins are ideal for the “mini” aspect, you can adapt this recipe. You could try using a standard muffin tin and baking slightly larger cups, or even experiment with free-form shapes on a baking sheet, though they might be a bit trickier to manage.
How long will the filled cannoli cups last?
For the best texture, it’s recommended to fill and serve these Mini Cannoli Cups within a few hours of preparing them. The shells can become soft if filled too far in advance. If you must store them, keep them refrigerated and enjoy within 24 hours, though the crunchiness may be slightly diminished.
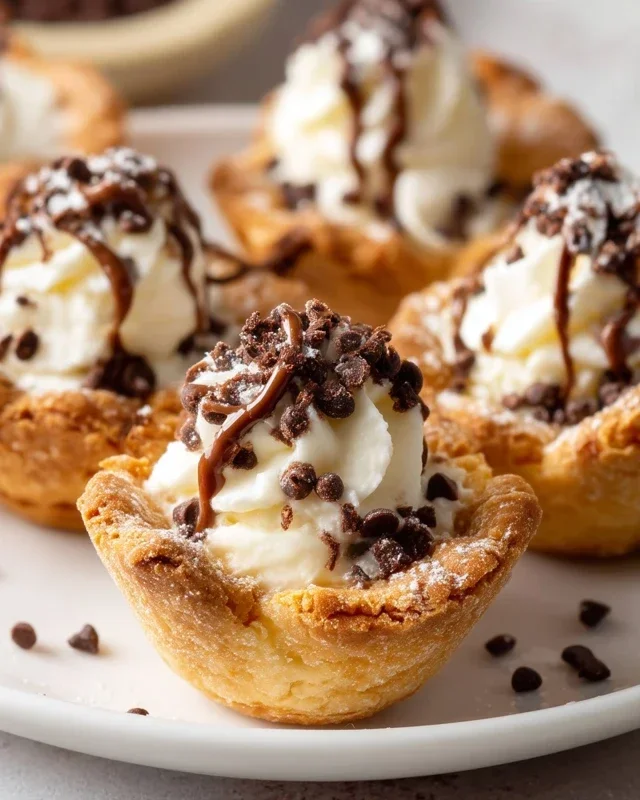
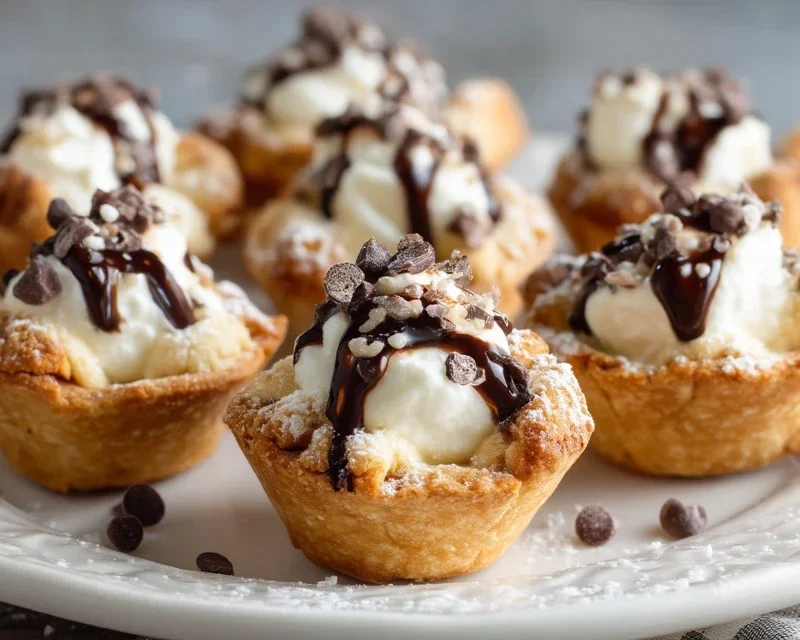
Mini Cannoli Cups
Delightful mini cannoli cups featuring a creamy ricotta filling nestled in a crisp, spiced pie crust shell, finished with sweet toppings.
Ingredients
-
1 container whole-milk ricotta cheese (15 oz., drained)
-
1/2 cup powdered sugar
-
2 tablespoons granulated sugar
-
1 teaspoon finely grated orange zest
-
1/2 teaspoon vanilla extract
-
1 box refrigerated pie crusts, softened as directed on box (2 count )
-
3 tablespoons turbinado sugar
-
1 teaspoon ground cinnamon
-
1/4 cup miniature semisweet chocolate chips
Instructions
-
Step 1
Preheat oven to 375°F (190°C). Lightly grease mini muffin tins. -
Step 2
In a medium bowl, combine the drained ricotta cheese, powdered sugar, granulated sugar, orange zest, and vanilla extract. Mix until smooth and well combined. Stir in chocolate chips. -
Step 3
Unroll the refrigerated pie crusts. Cut each crust into 6 equal squares. Press each square into the cups of the prepared mini muffin tins, forming a shell. -
Step 4
Bake for 12-15 minutes, or until the crusts are golden brown and lightly crisp. -
Step 5
While the crusts are baking, in a small bowl, combine the turbinado sugar and ground cinnamon. Mix well. -
Step 6
Remove the baked crusts from the oven and let them cool in the tins for a few minutes before carefully removing them to a wire rack to cool completely. -
Step 7
Once the cannoli cups are completely cool, fill them generously with the ricotta mixture. -
Step 8
Sprinkle the tops of the filled cannoli cups with the turbinado sugar and cinnamon mixture. Dust with additional powdered sugar if desired.
Important Information
Nutrition Facts (Per Serving)
It is important to consider this information as approximate and not to use it as definitive health advice.
Allergy Information
Please check ingredients for potential allergens and consult a health professional if in doubt.