Rainbow Cheesecake Swirl Bars- Easy Dessert
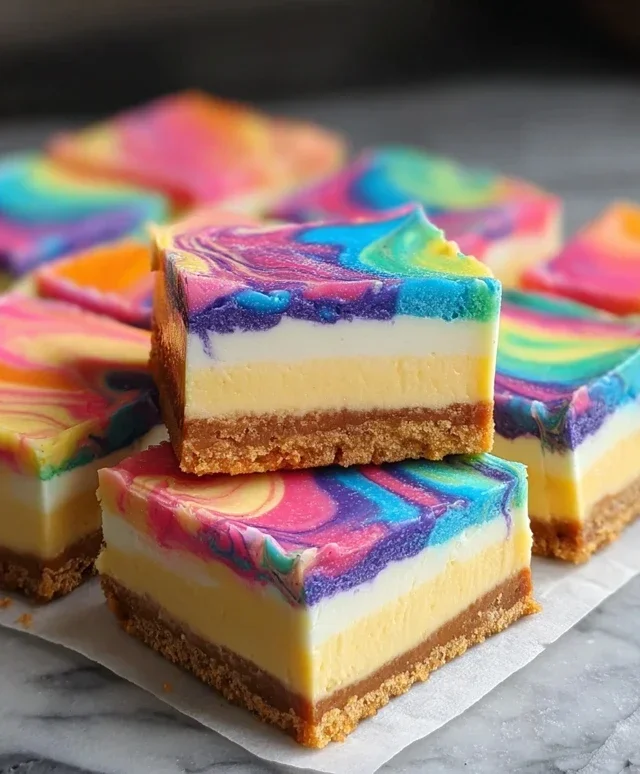
Rainbow Cheesecake Swirl Bars are here to brighten your day and dazzle your taste buds! Who can resist the creamy, dreamy allure of cheesecake, especially when it’s transformed into these fun, portable bars? They’re the perfect sweet treat for parties, picnics, or just a Tuesday when you need a little extra joy. What makes these Rainbow Cheesecake Swirl Bars truly special is their stunning visual appeal. Each swirl of vibrant color isn’t just beautiful; it’s a promise of delightful fruity flavors mingling with the classic, rich cheesecake base. Imagin extracte biting into that velvety smooth texture, punctuated by bursts of sweetness that dance on your tongue. It’s a guaranteed crowd-pleaser that’s surprisingly easy to make, proving that you don’t need to be a pastry chef to create something truly spectacular.
Rainbow Cheesecake Swirl Bars
Get ready to impress everyone with these dazzling Rainbow Cheesecake Swirl Bars! They’re a fun and vibrant twist on a classic favorite, perfect for parties, potlucks, or just a cheerful treat. The combination of a tender cake base and a creamy, tangy cheesecake swirl, all bursting with rainbow colors, is simply irresistible. Don’t let the vibrant appearance fool you; these bars are surprisingly easy to make and deliver a delightful flavor experience. We’ll guide you through each step, ensuring you achieve stunning results that are as delicious as they are beautiful.
Ingredients:
Preparing the Cake Base
The foundation for our colorful creation is a simple and delicious white cake base. This will provide a lovely texture and a neutral canvas for the vibrant cheesecake swirls to shine through.
1. In a large mixing bowl, combine the white cake mix, 1/2 cup melted butter, 1 egg, and 2/3 cup milk. Whisk everything together until just combined. It’s important not to overmix at this stage; a few small lumps are perfectly fine. Overmixing can develop the gluten in the flour too much, leading to a tougher cake. Once mixed, the batter should be thick but pourable.
2. Preheat your oven to 350°F (175°C). Grease and flour a 9×13 inch baking pan, or line it with parchment paper, leaving an overhang on the sides to make lifting the bars out easier later. Pour the cake batter into the prepared pan and spread it evenly to cover the bottom. You want a consistent layer for even baking.
Creating the Rainbow Cheesecake Swirls
This is where the magic happens! We’ll divide the cheesecake filling and color it with vibrant gel food colors to create our beautiful rainbow effect.
3. In a separate medium bowl, beat the softened cream cheese until it’s smooth and creamy. This is crucial for a lump-free cheesecake filling. Make sure your cream cheese is truly at room temperature; it should give slightly when pressed. Add the 1/3 cup sugar, 1 egg, and 1 teaspoon vanilla extract to the cream cheese. Beat again until everything is well combined and smooth. This mixture will form the base of our cheesecake swirls.
4. Now, it’s time to divide and conquer the color! Separate the cream cheese mixture into six small bowls. Add a few drops of each gel food color – pink, orange, yellow, green, blue, and purple – to each respective bowl. Gel food colors are concentrated, so start with a little and add more until you achieve the desired vibrancy. Gently stir each color into its bowl until fully incorporated. The more intensely you color them, the more striking your rainbow swirl will be.
Assembling and Swirling the Bars
The artistic part begin extracts as we layer and swirl the colors to create our signature rainbow effect.
5. Now for the fun part: creating the rainbow swirls! Dollop spoonfuls of each colored cream cheese mixture randomly over the cake batter in the baking pan. Don’t worry about being precise; aim for a scattered effect. Once all the colors are dolloped on, use a toothpick or a thin knife to gently swirl the colors together. Drag the toothpick through the dollops in a zig-zag or circular motion. Be careful not to over-swirl, as this can muddy the colors. You want distinct swirls that show off the rainbow. Think of it like painting a marble effect. The goal is to blend them just enough to create beautiful patterns.
Baking and Cooling for Perfect Bars
The final steps involve baking these beauties to perfection and allowing them to cool so they set up beautifully.
6. Pour the 9 extra teaspoons of milk over the swirled cheesecake batter in the pan. This might seem a little unusual, but it helps to thin the cheesecake slightly, ensuring a smoother bake and a more cohesive texture with the cake base.
7. Place the pan in the preheated oven and bake for 25-35 minutes, or until the edges are set and a toothpick inserted into the center comes out mostly clean. The cheesecake part should be set but might jiggle slightly in the very center. Avoid overbaking, as this can lead to a dry cheesecake.
8. Once baked, carefully remove the pan from the oven and let the bars cool completely on a wire rack. This cooling process is essential for the cheesecake to firm up properly. Once cooled to room temperature, you can place the pan in the refrigerator for at least 2 hours, or even overnight, to ensure they are fully set before cutting. This chilling step makes for much cleaner cuts and a better texture.
Cutting and Enjoying Your Rainbow Masterpiece
The moment of truth! We’ll slice these vibrant bars and prepare to enjoy the delicious outcome of our efforts.
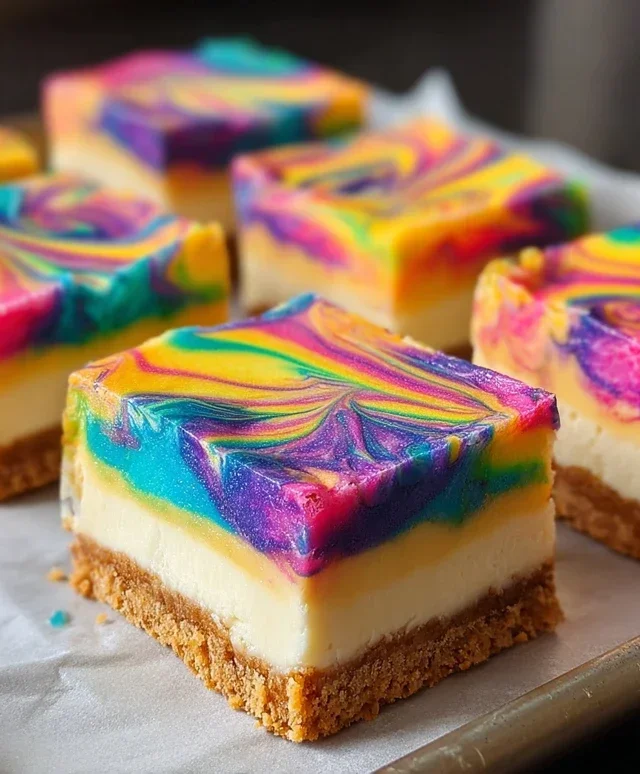
9. Once thoroughly chilled, use the parchment paper overhang to lift the entire block out of the pan onto a cutting board. Use a sharp knife to cut the bars into your desired size. For cleaner cuts, you can dip your knife in hot water and wipe it dry between each cut. Now, marvel at your beautiful, colorful creation and enjoy these delightful Rainbow Cheesecake Swirl Bars! They are perfect served chilled.
Conclusion:
These Rainbow Cheesecake Swirl Bars are truly a showstopper, offering a delightful blend of creamy cheesecake, a buttery grabeef ham cracker crust, and vibrant swirls of fruity color. They’re surprisingly easy to make, making them perfect for both seasoned bakers and those looking for a fun project. The visual appeal alone is enough to impress, but the taste will have everyone beggin extractg for the recipe. They’re perfect for birthdays, celebrations, or just because you want to brighten up your dessert table.
I love serving these chilled, cut into neat bars. They’re fantastic on their own, but a dollop of whipped cream or a few fresh berries can elevate them even further. For variations, don’t be afraid to experiment with different extract flavors in your cheesecake batter, like a touch of lemon or almond. You could also swap out the grabeef ham cracker crust for crushed vanilla wafers or even shortbread cookies for a different nutty profile. I truly encourage you to give these Rainbow Cheesecake Swirl Bars a try – you won’t regret the burst of flavor and color they bring to any occasion!
Frequently Asked Questions:
Can I make these cheesecake swirl bars ahead of time?
Absolutely! These bars are actually best made a day in advance. This allows the cheesecake to set completely and the flavors to meld beautifully. Simply cover them tightly with plastic wrap and store them in the refrigerator.
What are some alternative fruit flavors for the swirls?
The possibilities are endless! Beyond the classic strawberry, raspberry, and blueberry, consider mango, passionfruit, lime, or even a tropical blend. Just ensure your fruit purée is fairly thick to avoid making the cheesecake too watery.
Rainbow Cheesecake Swirl Bars
Vibrant and delicious bars featuring a creamy cheesecake swirl on a tender cake base, colored in a beautiful rainbow.
Ingredients
-
1 box white cake mix
-
1/2 cup melted butter
-
1 egg
-
2/3 cup milk, plus 9 extra teaspoons
-
Gel food colors: pink, orange, yellow, green, blue, and purple
-
12 oz cream cheese, softened
-
1/3 cup sugar
-
1 egg
-
1 teaspoon vanilla extract
Instructions
-
Step 1
Preheat oven to 350°F (175°C). Grease and flour a 9×13 inch baking pan. -
Step 2
In a medium bowl, combine the white cake mix, melted butter, 1 egg, and 2/3 cup milk. Mix until just combined. Press half of the batter evenly into the bottom of the prepared baking pan. -
Step 3
In a separate bowl, beat the softened cream cheese until smooth. Beat in the sugar, 1 egg, and vanilla extract until well combined. -
Step 4
Divide the cream cheese mixture into six small bowls. Add one gel food color to each bowl and mix until evenly colored. Add 1 teaspoon of milk to each colored cream cheese mixture to achieve a swirlable consistency. -
Step 5
Dollop spoonfuls of the colored cream cheese mixtures randomly over the cake batter in the pan. Use a toothpick or knife to gently swirl the colors together, creating a marbled effect. -
Step 6
Dollop the remaining cake batter over the swirled cheesecake layer. Gently spread to cover. -
Step 7
Bake for 25-30 minutes, or until the edges are golden brown and the center is set. Let cool completely before cutting into bars.
Important Information
Nutrition Facts (Per Serving)
It is important to consider this information as approximate and not to use it as definitive health advice.
Allergy Information
Please check ingredients for potential allergens and consult a health professional if in doubt.